New Year’s means hitting the reset button, starting fresh, and reflecting on ways to become our #BestSelves. We want to channel some of this new-year-new-you energy into improving our post-production game for 2018.
At Tongal, we’ve taken stock of everything our community’s accomplished this year (hint: it’s a lot!) and started thinking about ways we can improve for 2018. We kept coming back to one thing: post-production. We believe everyone can get a little better at
That’s why we’re gifting you this new Post-Production 101 section to help you through each stage of post. From first cuts to mastering, this section is full of useful tools and resources. And following the timeless tradition of putting New Year’s resolutions into a listicle format, we’ve assembled the top 10 things you can improve on in post for 2018:
1. Become better at QCing my files
Fun fact: every time you properly QC a file, an angel gets its wings!
QC simply means checking your media files for common errors like dropped frames, misspelled captions, audio blips, etc. Most file errors occur during the rendering process, so it’s important to check your files after they export. QCing is a little more than just watching and listening to your file; it requires you to check the format and metadata. When done correctly, it speeds up the post-production process and keeps you off our Asset Manager’s Naughty List. If you’re unsure how to run a proper QC, then we encourage you to check out our new Video QC Form, which contains interactive resources and YouTube video tutorials that answer questions like “What is title safe?” and “How do I set audio levels?”
2. Know my destination platform
Knowing which platform your Video will end up on is key to planning your post-production workflow. The sooner you know, the sooner you can start planning. The destination platform may impact the way you shoot your project. For instance, if you’re shooting for Facebook’s vertical aspect ratio (9X16), you’ll want to focus your action closer to the center of the frame. You can also use your destination platform to preview your edits. For example, if you’re editing for mobile, watch your first cut on a mobile device in the correct aspect ratio to see how it plays out.
3. Establish safer media management practices
Make it your mission to practice safer media management in your day-to-day workflow. Why? Because you never know when a piece of equipment will crash or fail. The first step to safer data storage is to use the 3-2-1 system, described in our Asset Management Guide. The 3-2-1 system safeguards against hard drive failure and other natural disasters. It requires you to maintain at least 3 copies of your files - 2 on-site on two different types of media (Backup Hard Drive or a RAID system), and 1 copy offsite.
4. Organize my hard drives and label project files like a pro
One day, your baby bird of a project will leave its nest (usually on a hard drive or through a cloud-based service) and land in the hands of another editor. They will need to understand exactly what’s on it. If your hard drive is in disarray, the editor may come back to haunt you like the Ghost of Christmas Past.
Having a good file structure is not only good etiquette, but it will help you streamline your editing process. We’ve laid out some best practices in the Project Delivery Guide for how to organize and label your media files on your hard drive and NLE system.
5. Templatize! Build templates for different project types
Templatize is just a fancy way of saying create templates for future projects using your favorite files structure. You can do this on your desktop by creating a folder that contains your file structure in the correct order.
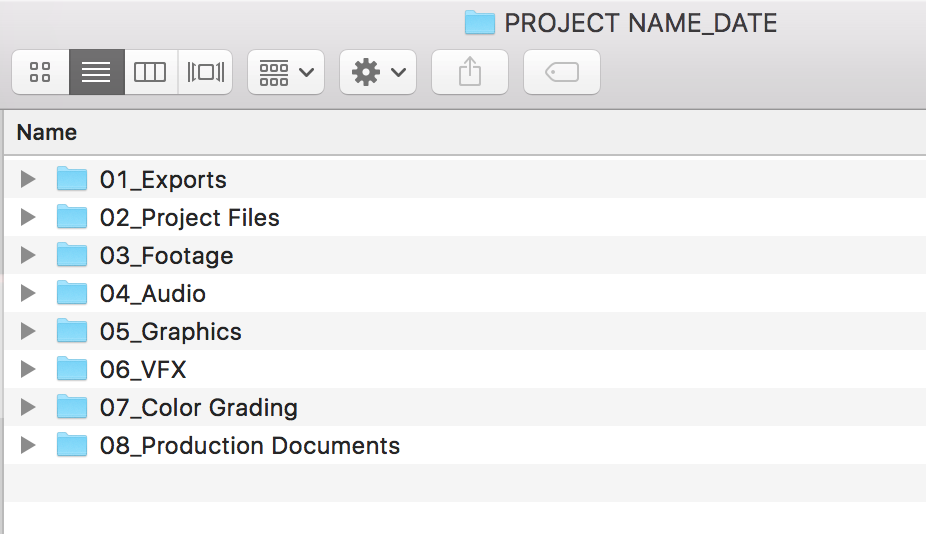
You can also create templates for your NLE system by saving project files. That way you don’t have to build them from scratch every time you start a new project. You’ll likely need project structures for different project types from long-form content to commercials. Create templates for the types of projects you most frequently work on.
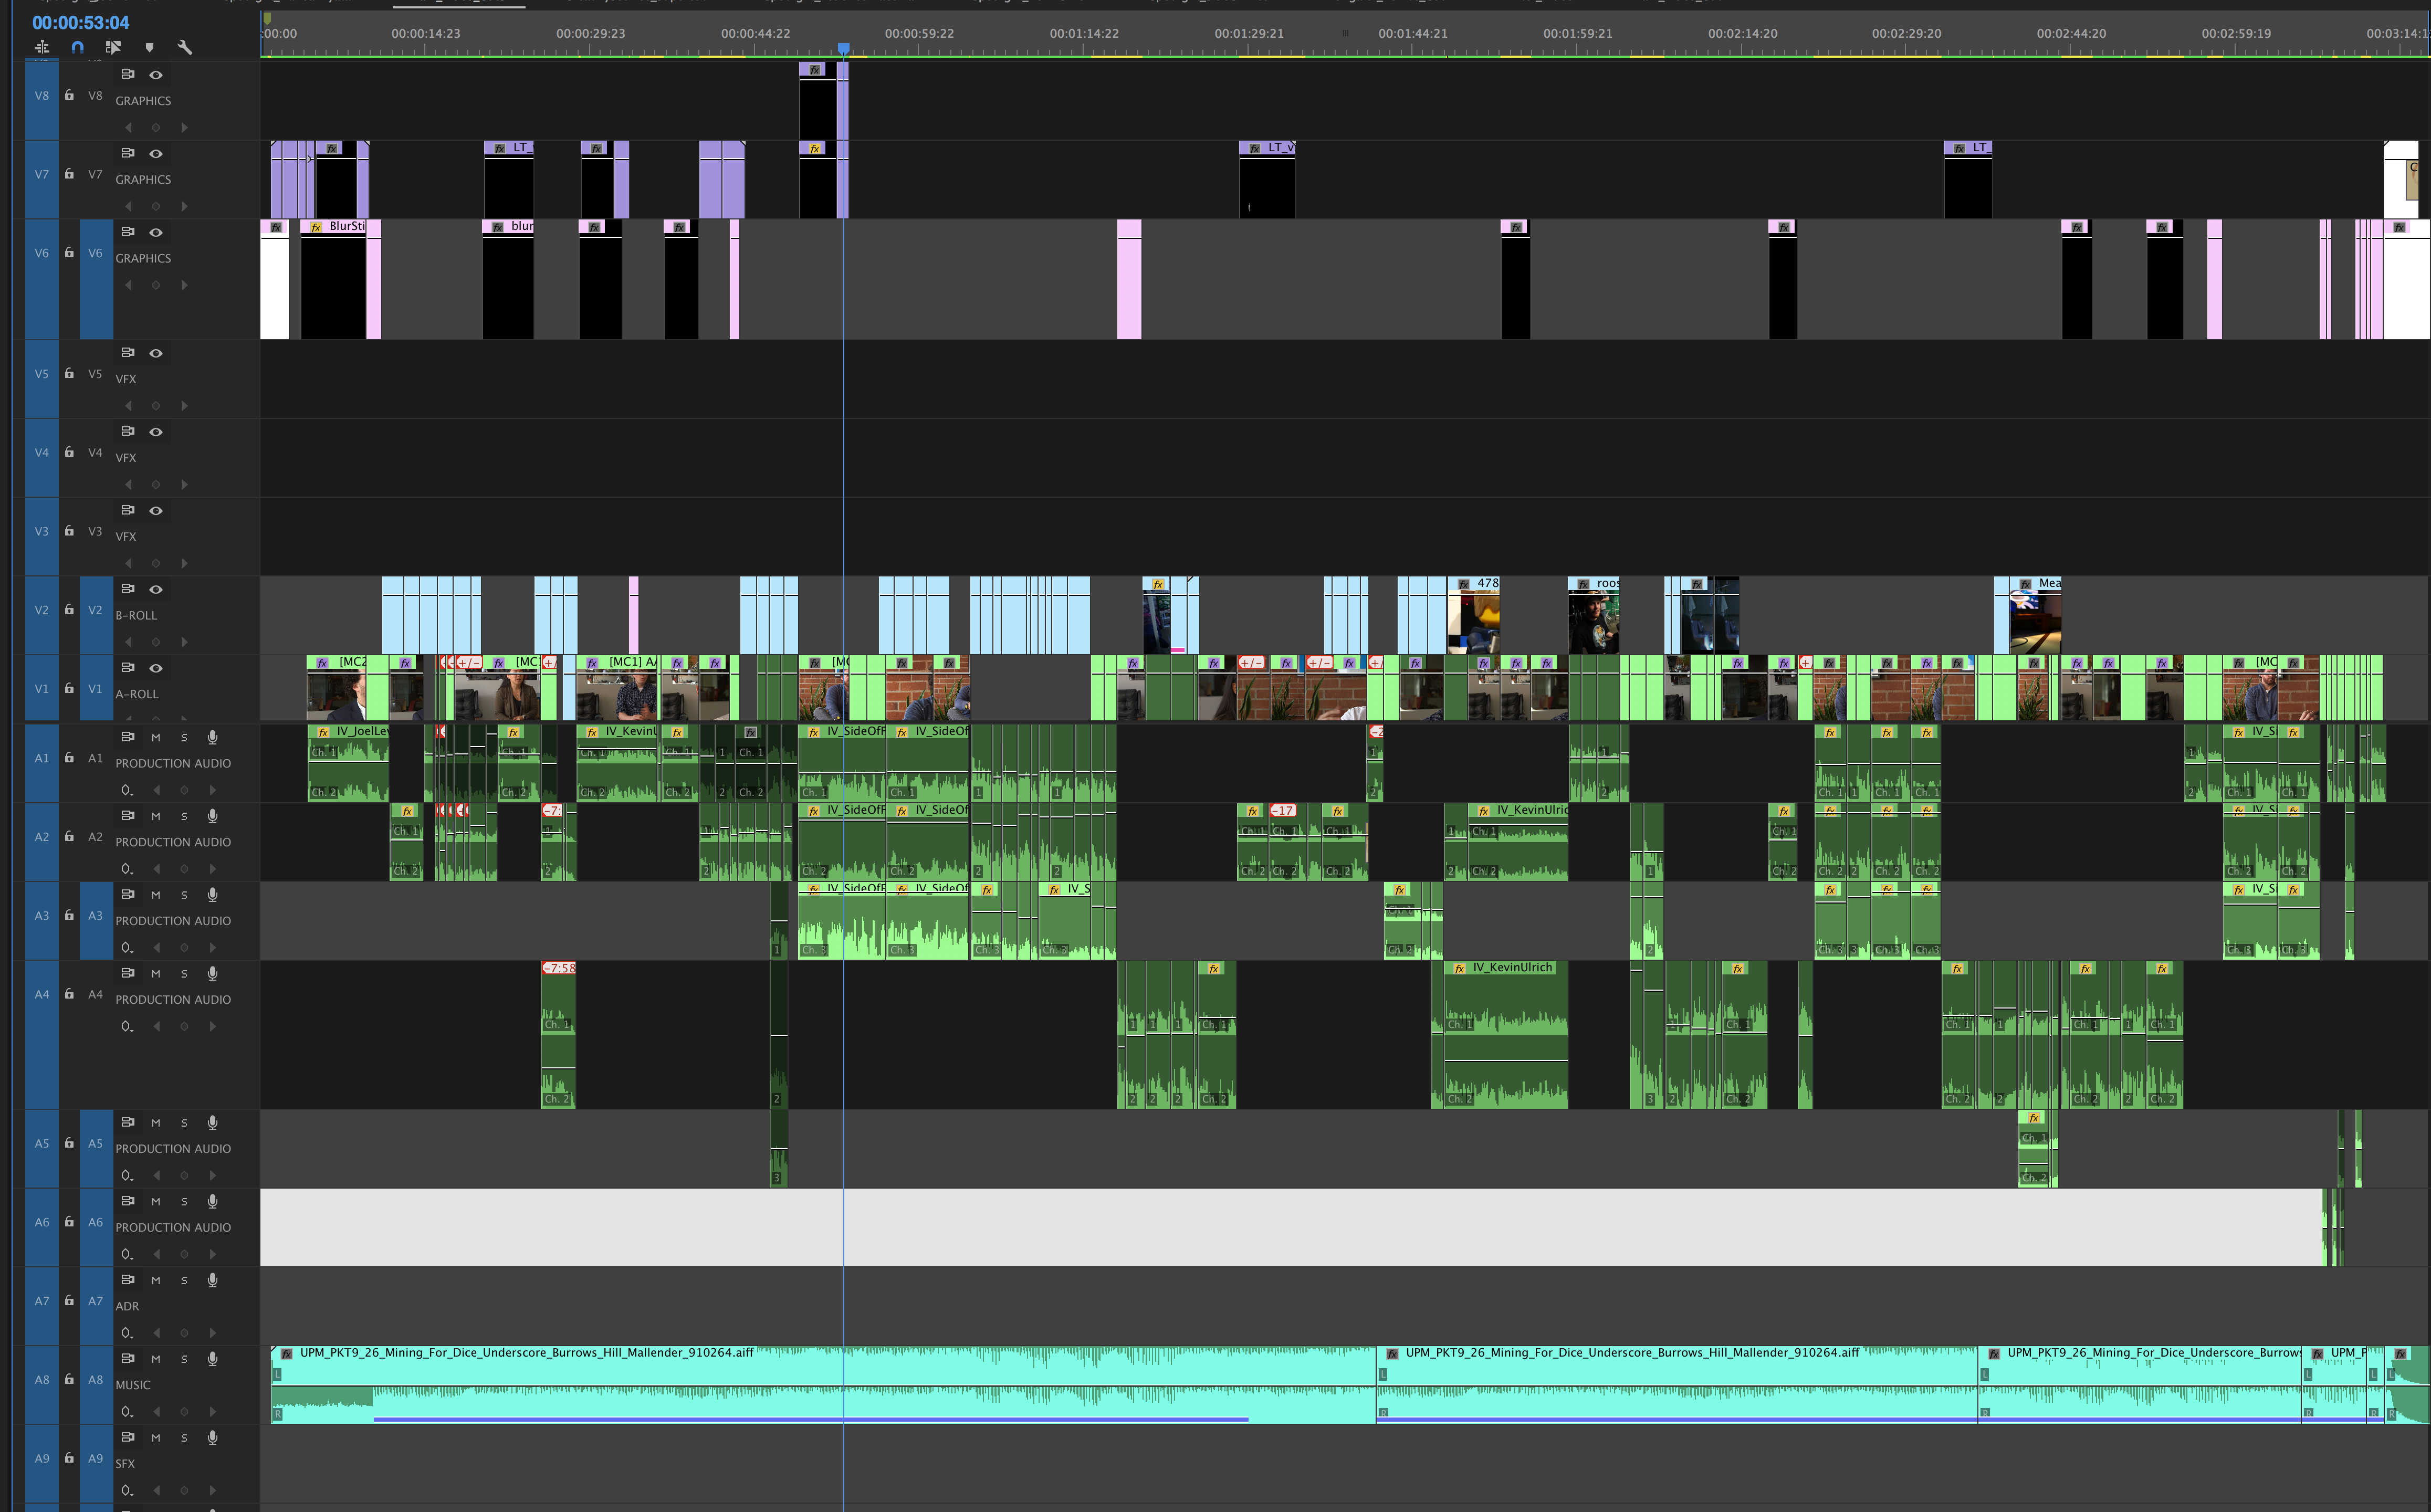
6. Keep my editing timelines neatly layered
Timelines can easily get out of hand, especially when dealing with tons of visual effects and music/audio tracks. Timelines can also reveal a lot about our editing habits. To keep your timelines neat and tidy, layer and stack your tracks by content. The top video tracks should contain your titles and graphic overlays; the middle video tracks can be organized by shot type (close-ups, medium close-ups, etc.), camera, and b-roll. Your audio can be layered by music tracks, sound effects, and captions. Layering your timeline allows you to mute and solo tracks, and audition music tracks. You can also turn off your captions track when sending in a textless master. Some editors even like to color code their tracks to maintain a visual hierarchy. Having a neatly organized timeline will work wonders for your editing workflow.
7. Get familiar with Music Cue Sheets
If your project has a music track or score, then you’ll need to fill out a Music Cue Sheet. This allows performance rights companies like BMI and ASCAP to track the use of music in commercials so musicians are fairly compensated for their work. Onc
8. Turn my paperwork in early
Turn in your production paperwork before you master files so we can approve and schedule your payments in time for the earliest pay cycle after you deliver all your project files. This means getting all your permits, location, talent and music releases in order before you finish editing. You can upload your credits and releases directly to the Payments page in your Dashboard at any time.
9. Become fluent in the language of post-production
Post-production is full of highly technical terms like bit rate, codec, DCP. Get familiar with these terms and become more fluent in the language of production. Understanding these terms is key to delivering your files in the correct format. To help, we’ve created this Post-Production Glossary.
10. Read and ask questions
Lastly, keep up on the latest trends in post-production and don’t be afraid to ask questions. Your NLE system will update every few months with new features that will help your efficiency. Your Producer is here to help as well. For more technical questions, you may reach out to our Asset Manager. Our goal is to help you deliver the best possible version of your project to the Sponsor.
As with any big New Year’s resolution, take it one step at a time. Good habits don’t have to happen overnight; they take time to build. Figure out which methods help you the most because even small changes to your setup and workflow can make a huge impact. If you want to share any other good habits in post-production, post them in the comments below. Happy New Year!