If a picture is worth a thousands words, a Cinemagraph is worth at least... a thousand and one. Before you learn how to make a Cinemagraph, you may want to know what it is.

It’s a movie made up of photos! No wait that’s just a movie. Hold on, it’s a movie within a photo (“...the files are in the computer?!”)
Anyways we didn’t name or invent it, but gosh darn it, the kids love it. More importantly, regarding your work on Tongal, it’s a social asset brands often use to complement their wider ad campaigns on Instagram and Facebook.
Moral of the story is: you need to know how to make one if you’re pitching on Tongal, and if I can make one, by gum, so can you.
The first thing you need to do, however, is PLAN. Do not leave the Cinemagraph until the last minute of the last day of production. Plan what the Cinemagraph will look like and prepare to dress and shoot it as you if it were part of the production itself, because as a project deliverable it is part of your production.
Okay, enough of my blabbering. Here’s how you create the illustrious Cinemagraph / looping gif:
Tools needed:
Step 1: Take a video of your subject
I’m gonna pour liquid from one thing into another, because you see that a lot for some reason. Be sure that the human stays as still as possible when performing the action. Whatever you decide to shoot on make sure it is filmed in 1:1 aspect ratio since it will likely be viewed on mobile.
Step 2: Import footage into Photoshop CC
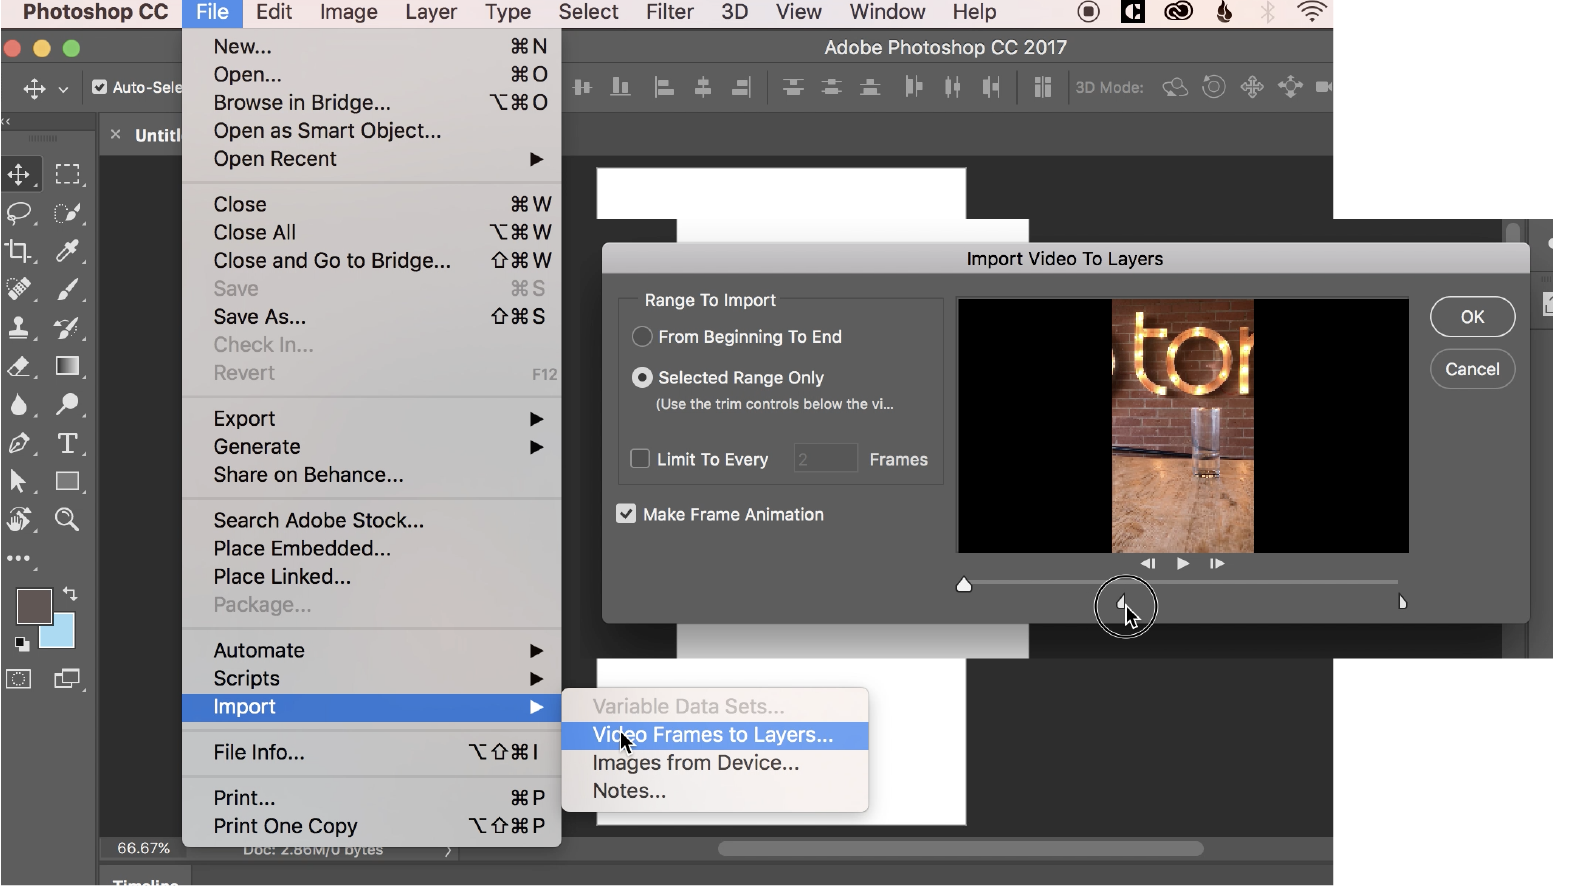
File > Import > Video Frames to Layers > Select a rough region of what you think you want to include in the gif.
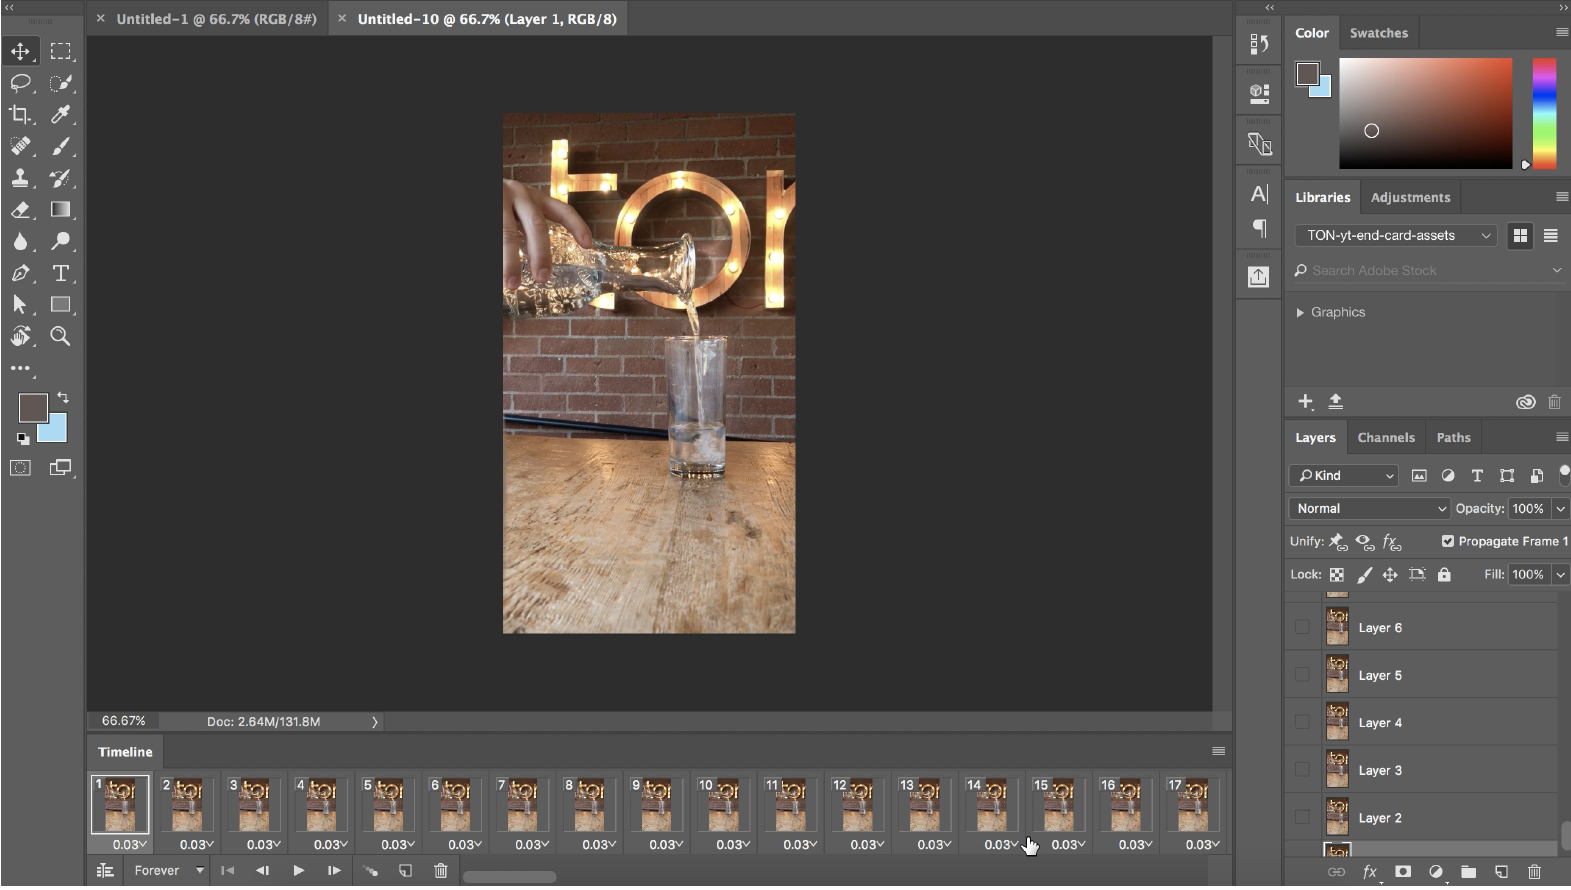
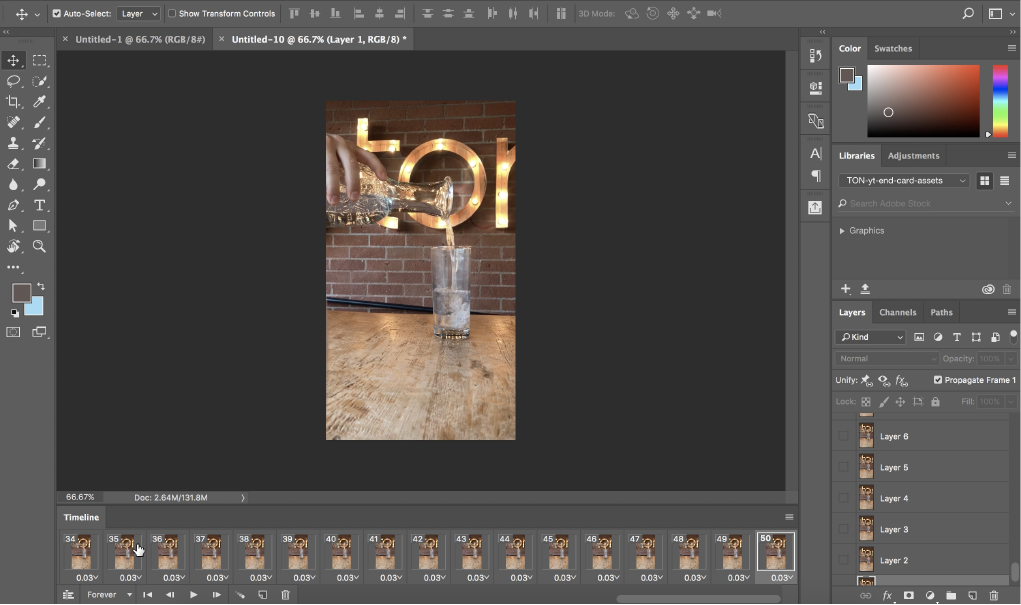
If you don’t see a timeline below your canvas click Window > Timeline
Play the clip and delete any frames you don’t want to use. Be sure you delete those same exact frames in the layers panel on the right.
Step 3: Create a mask; aka “The Magic”
We want to create a mask so only a section of the image (the water in my case) appears to be moving, while the rest of the photo is frozen in the sands of time (deep thoughts with Nolan Schneiderman).
Select the first layer at the bottom of the panel. Right click and select Duplicate Layer. Give it a highly specific name like… “Mask.”
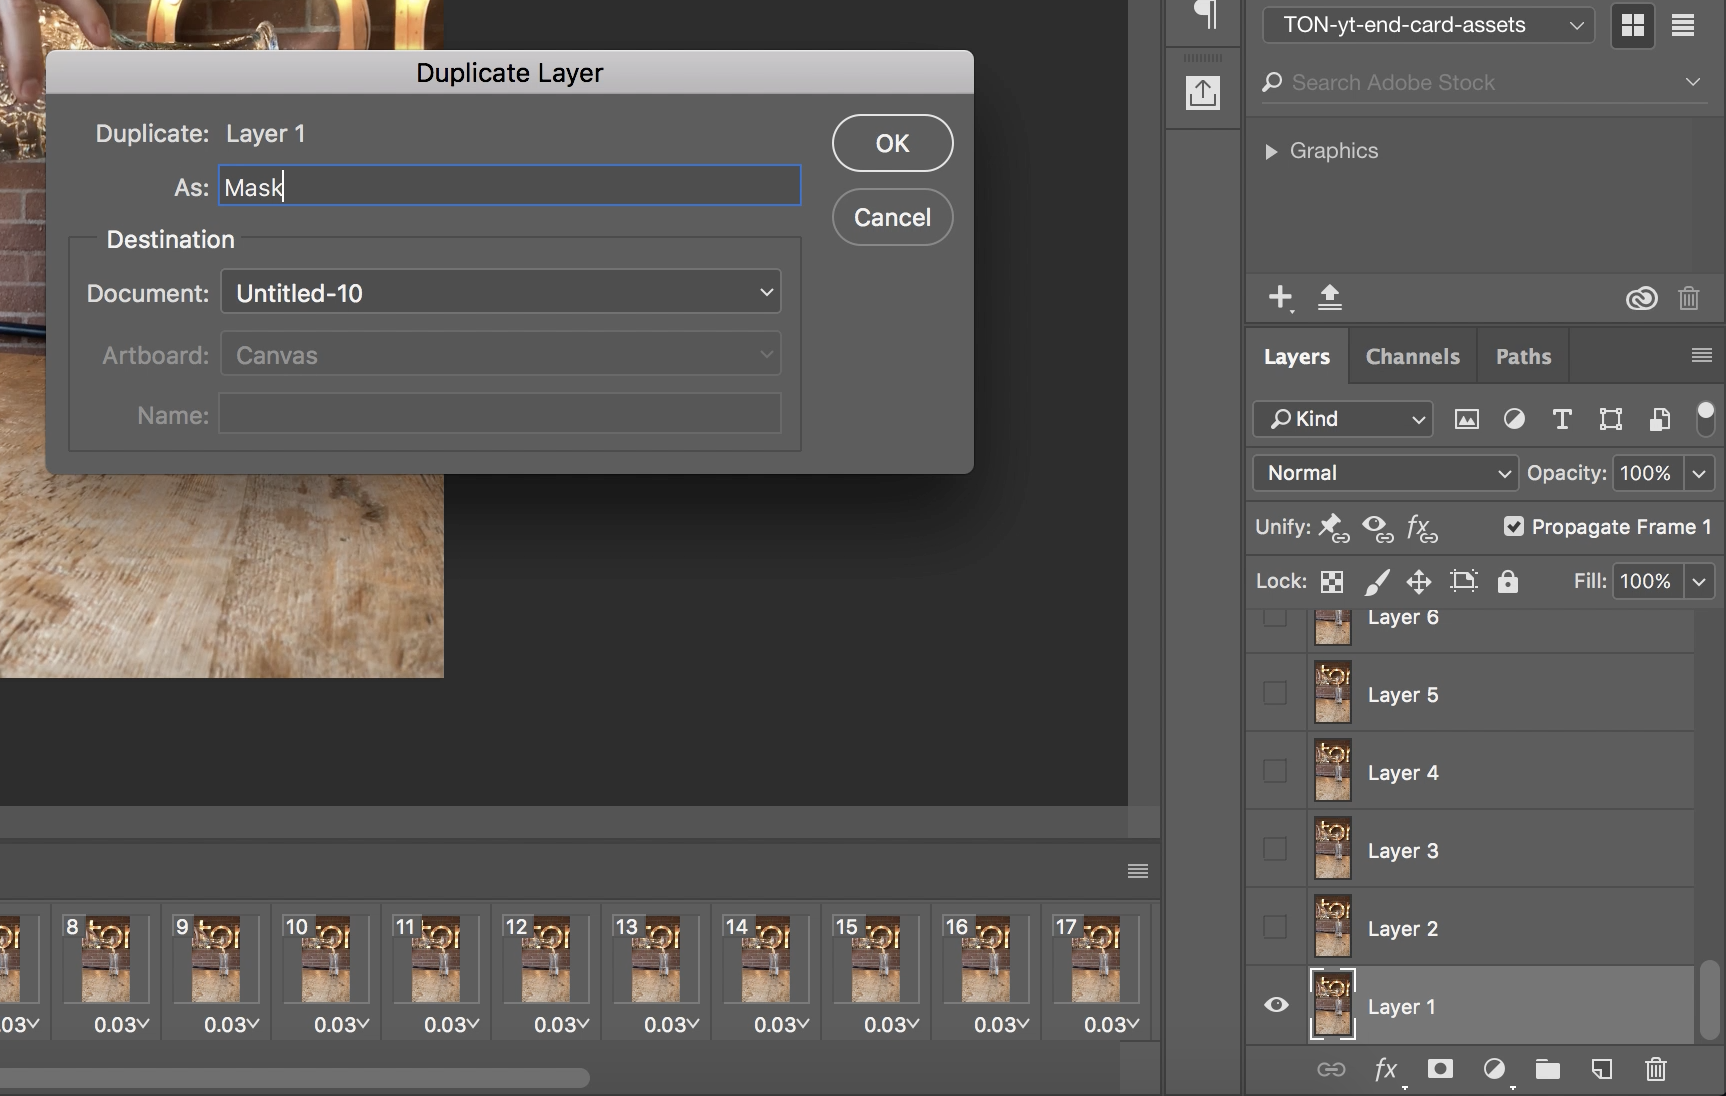
Now move “Mask” to the top of the layers panel (so that it’s above your last frame). Play (spacebar) through the timeline again -- psych! it should not appear to play, because the mask layer is now on top.
With “mask” highlighted click Select in the menu bar > “Select and Mask” (this brings up a new window).
Click View Mode on the right hand side and choose Overlay. It’s easier to see this way.
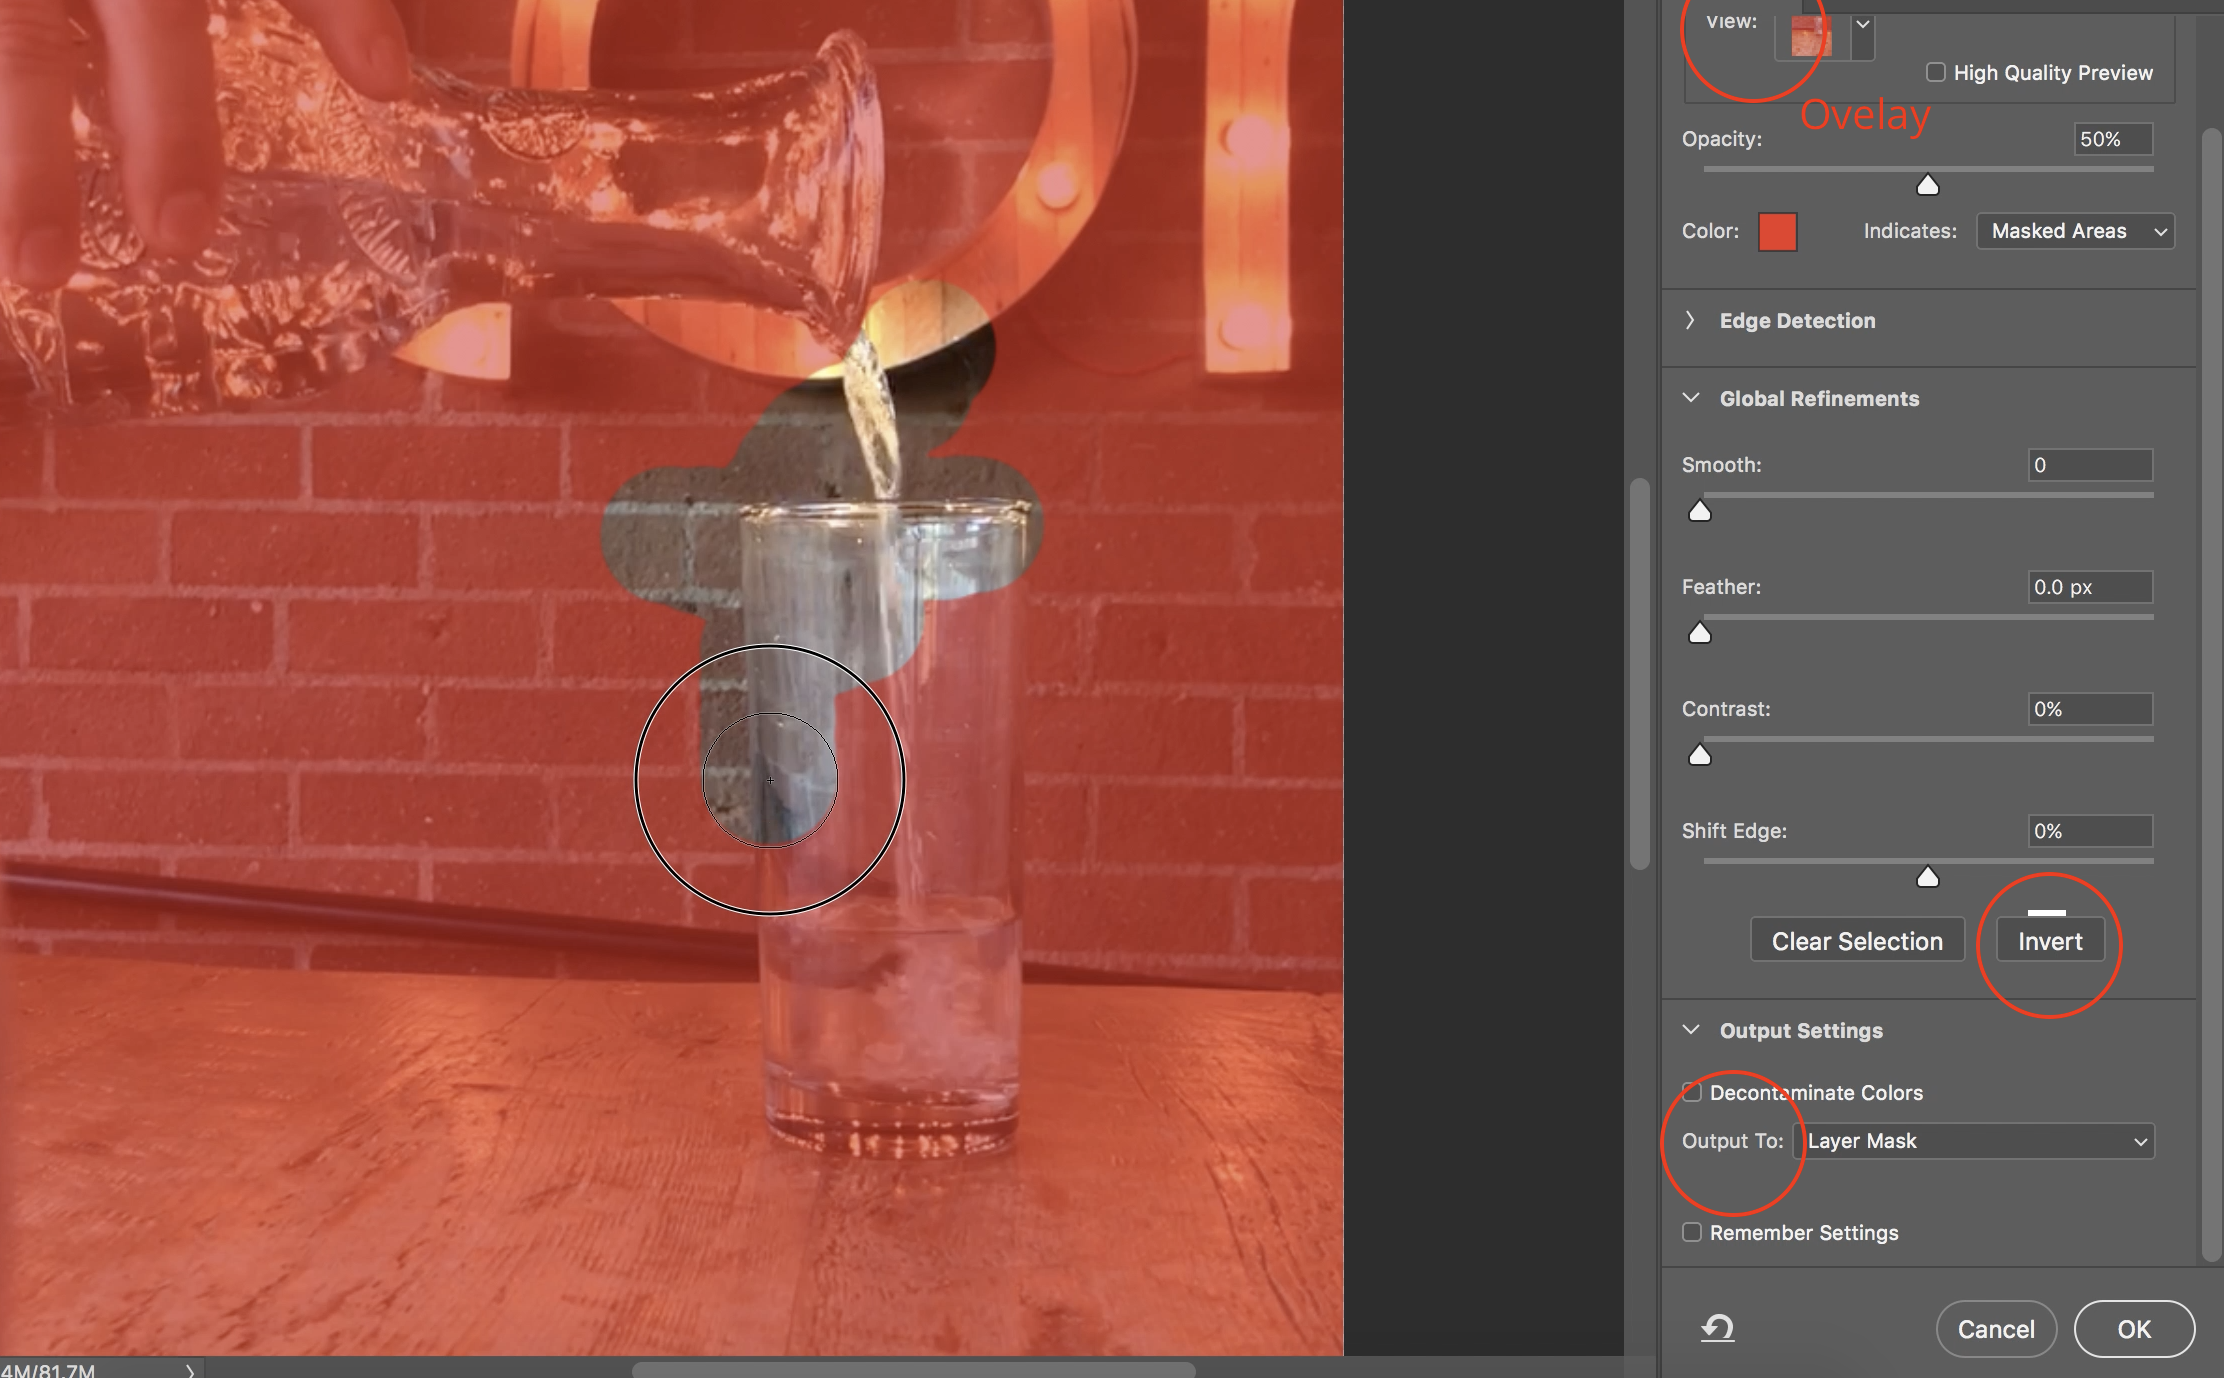
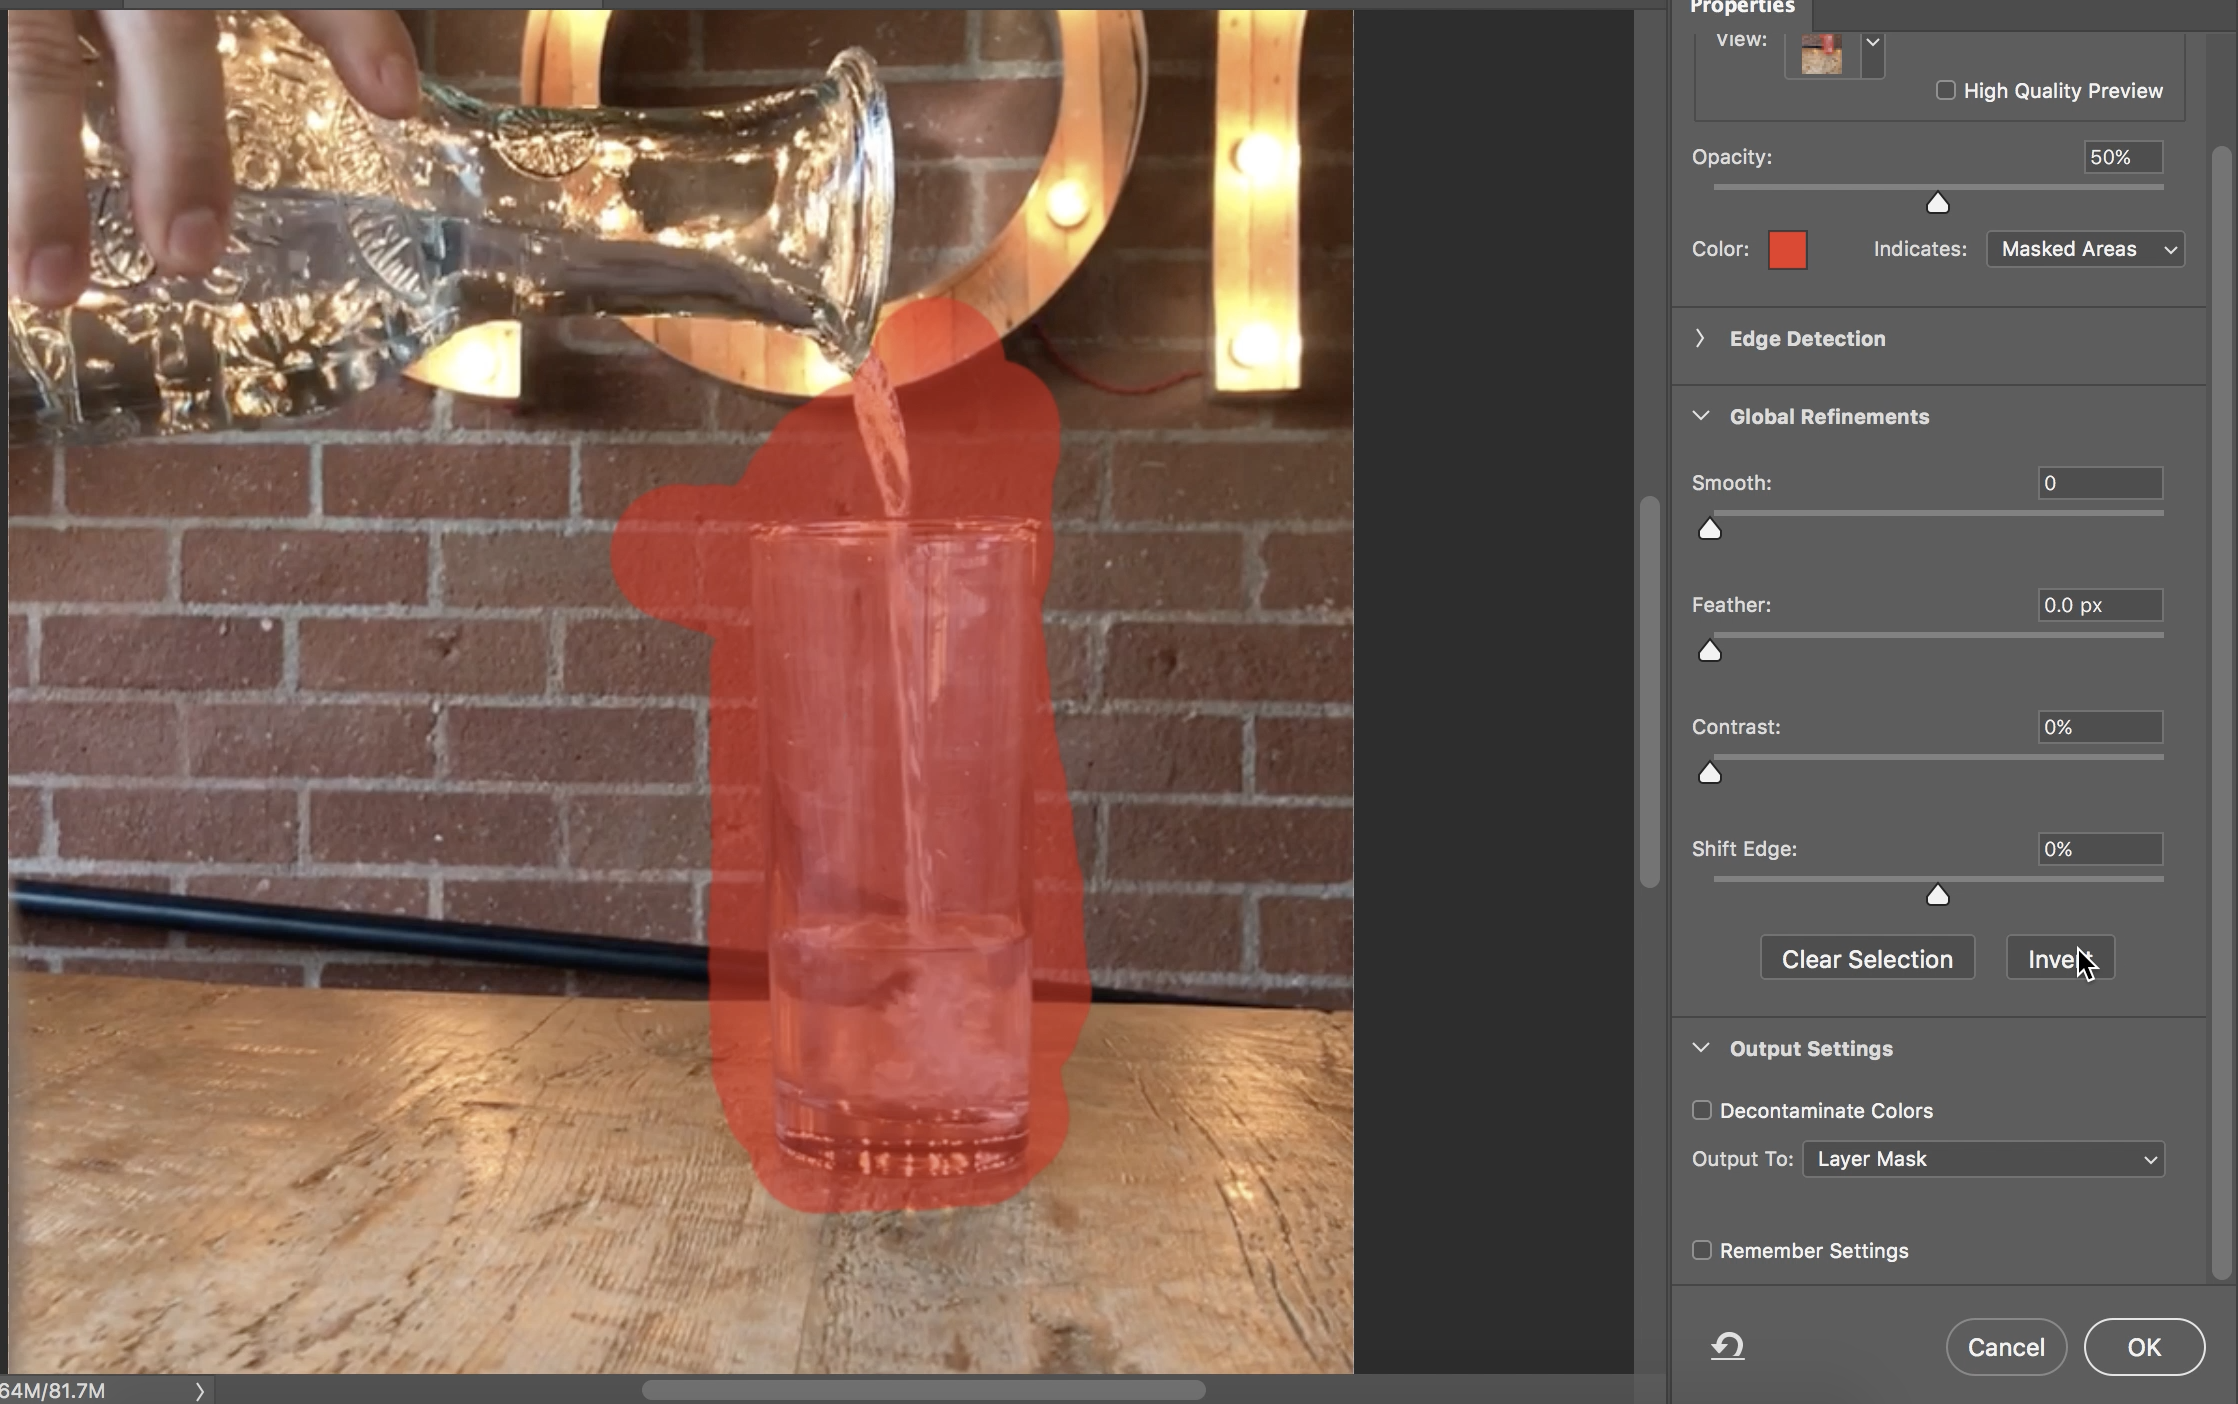
Select the part of the image you want to see moving. Then check “invert” (seems counterintuitive, but more times than not this is actually less work, because you’re selecting a smaller area to mask). Make sure the “Output to” is “Layer Mask.” Click OK.
Now play your clip (if the clip isn’t playing, you didn’t set “Output to” as “Layer Mask). I’ll wait…. Yaaaaay! Exciting right? Almost!
All good Cinemagraphers know that it looks much better when the action plays and then reverses and then loops. Let’s do that real quick.
Step 4: Reverse, reverse (cha cha real smooth)
Select all the frames in your timeline and duplicate them.
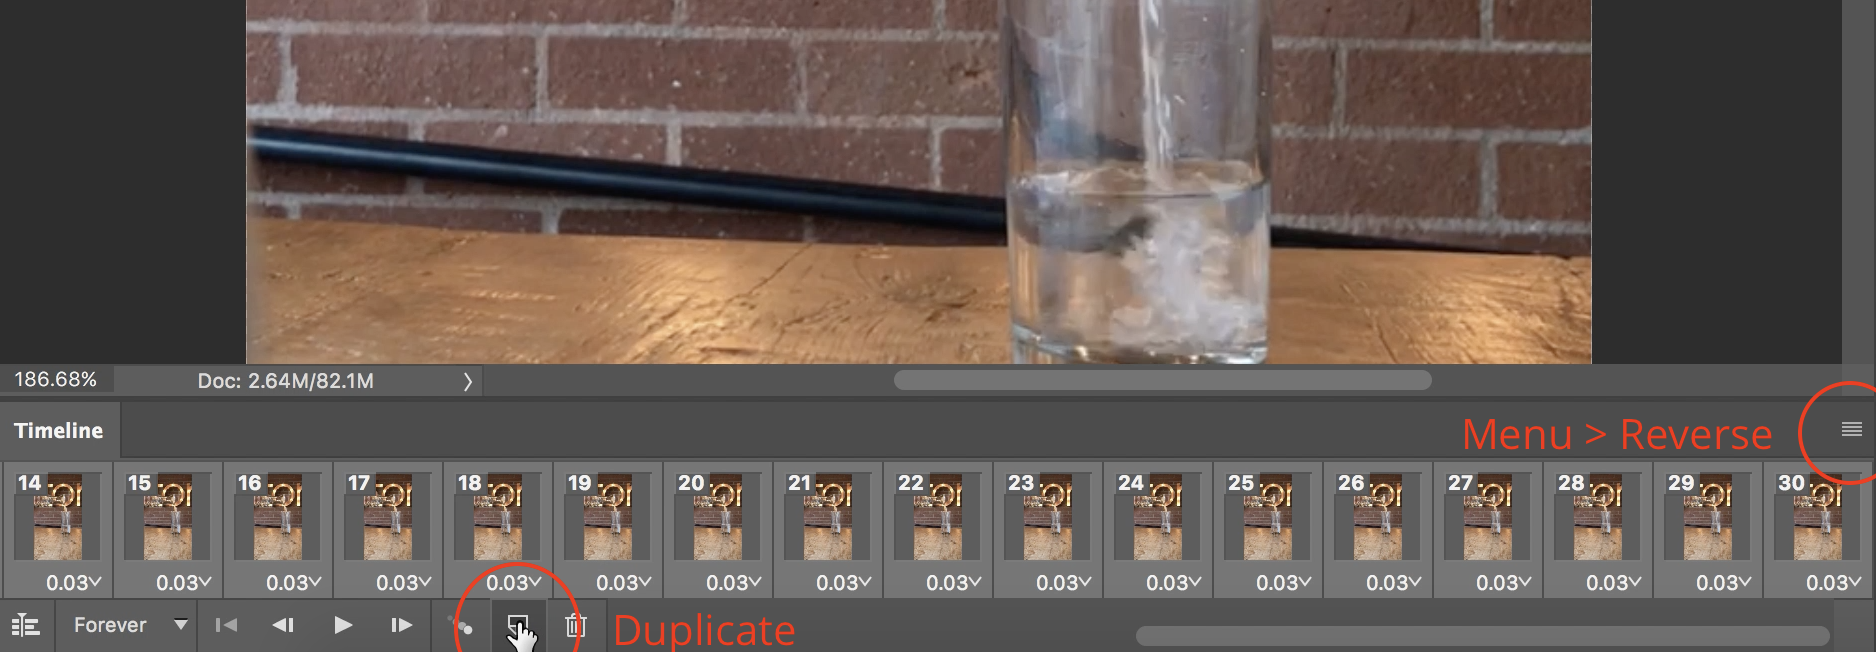
The new frames should be highlighted automatically. Click the little hamburger menu button in the timeline on the right and select “Reverse Frames.”
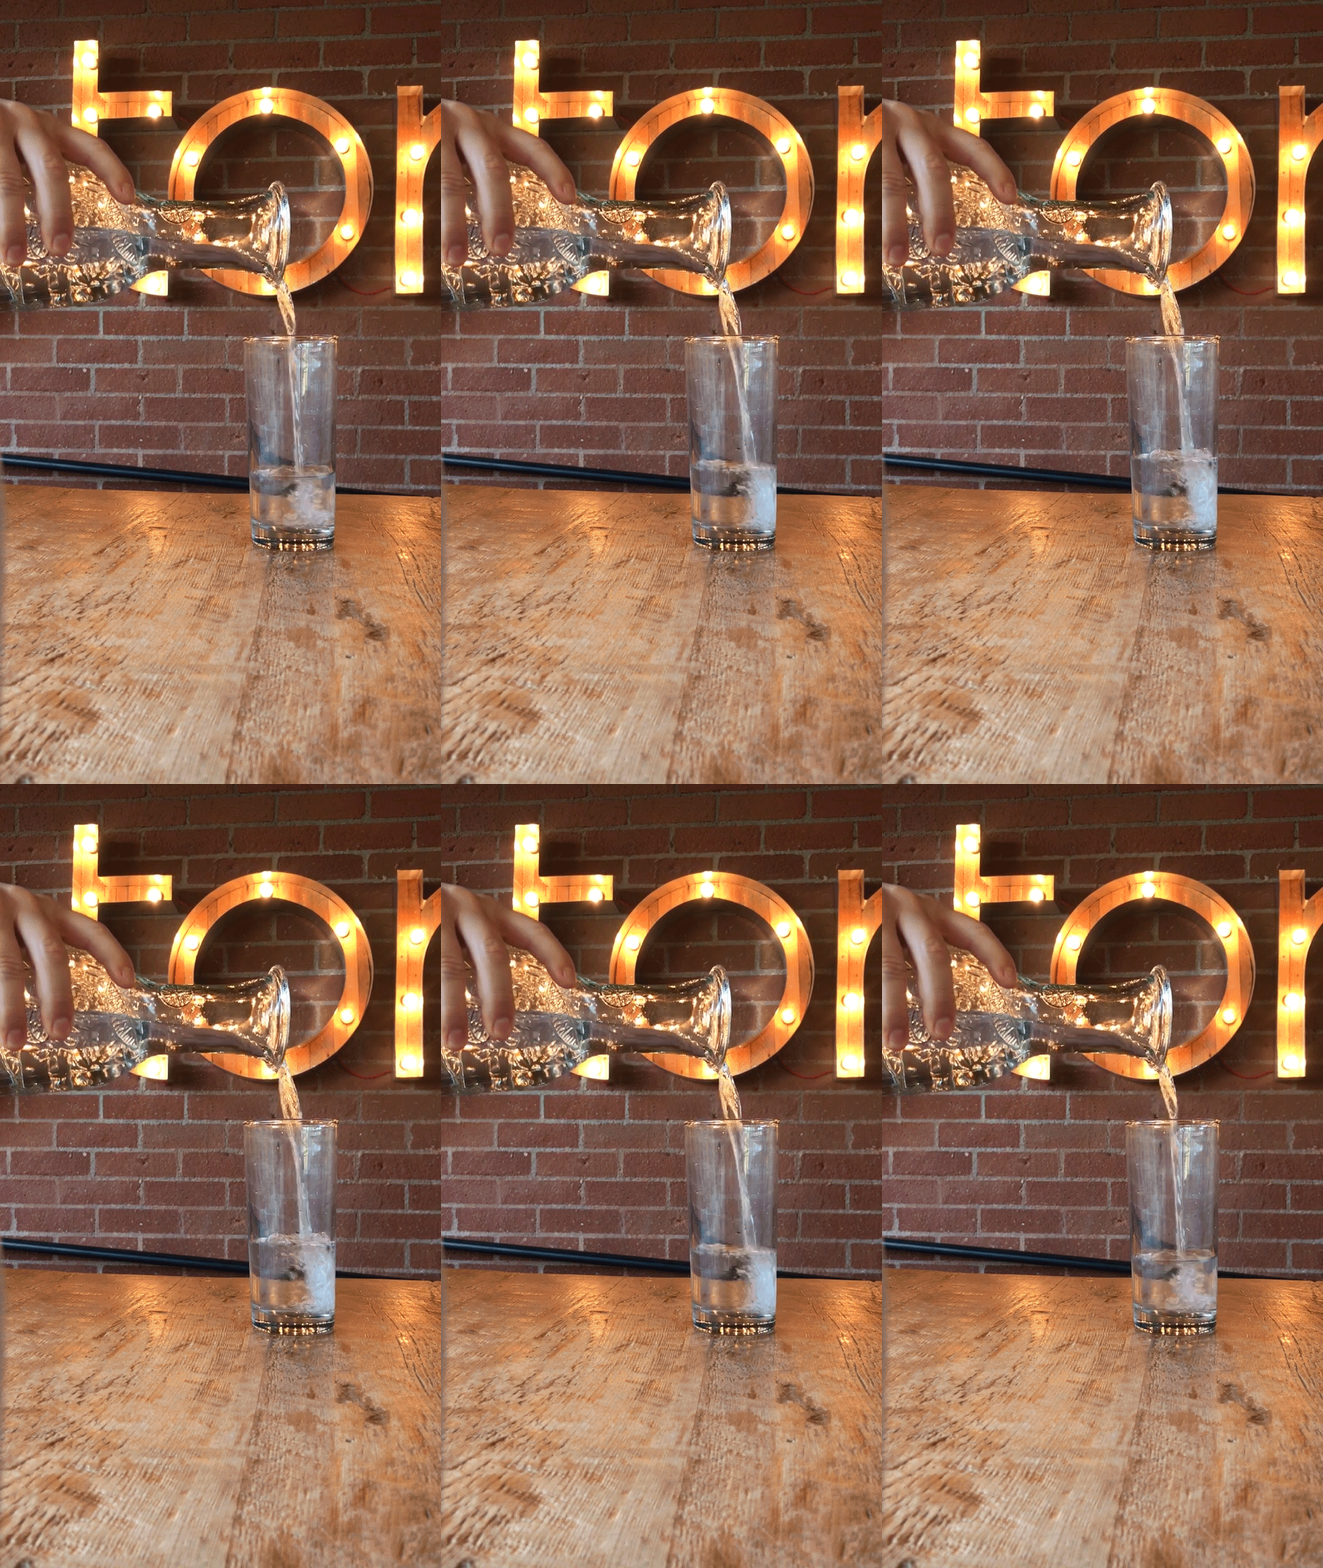
Ooooo that’s looking nice moving on…
Step 5: Export
Click File > Export > Save for Web
Usually Ps knows you’re trying to make a GIF, if not, select GIF as the output. Then make sure the looping option is set to Forrrrehhhvvfffeer. And for reals, make sure you are at frame 1 of x before you save.

That’s it!! Now turn in the rest of your deliverables to Tongal so you can receive your final payment!
Let us know what else you’d like to learn in the comments below!