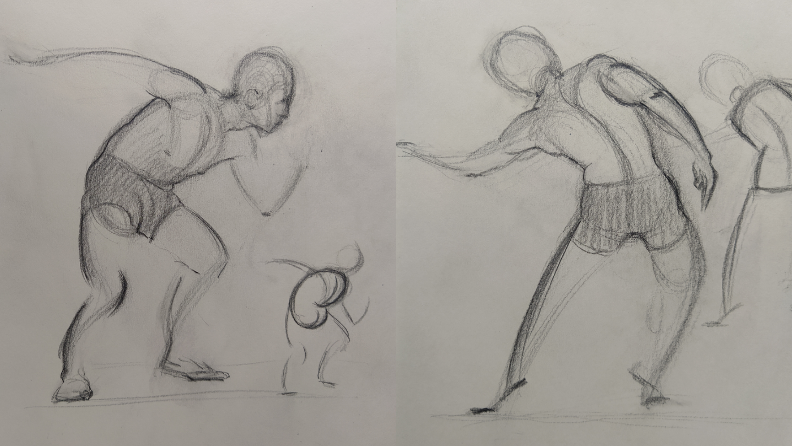
What takes character concept art from good to great? The key is moving from sketching static, stationary figures to drawing characters in motion.
Every character artist feels daunted when tackling dynamic poses for the first time. Many new artists draw figures with static and stiff poses.
However, the way a figure stands and moves can reveal that character’s personality and identity. I’ll show you some simple ways to make your concept art characters more dynamic and appealing. Mastering this technique takes time and practice, but with these useful tips, you’ll get a solid head start.
Why am I qualified to teach you about this subject? In addition to being a Tongal creator, I am studying Fine Arts at the University of Seville. There, I have taken a course in the FORCE drawing method from the creator himself, Michael Mattesi. The FORCE drawing method teaches animators and illustrators to effectively capture life and movement in their characters.
Here are my top five tips for drawing dynamic poses in your character concept art sketches.
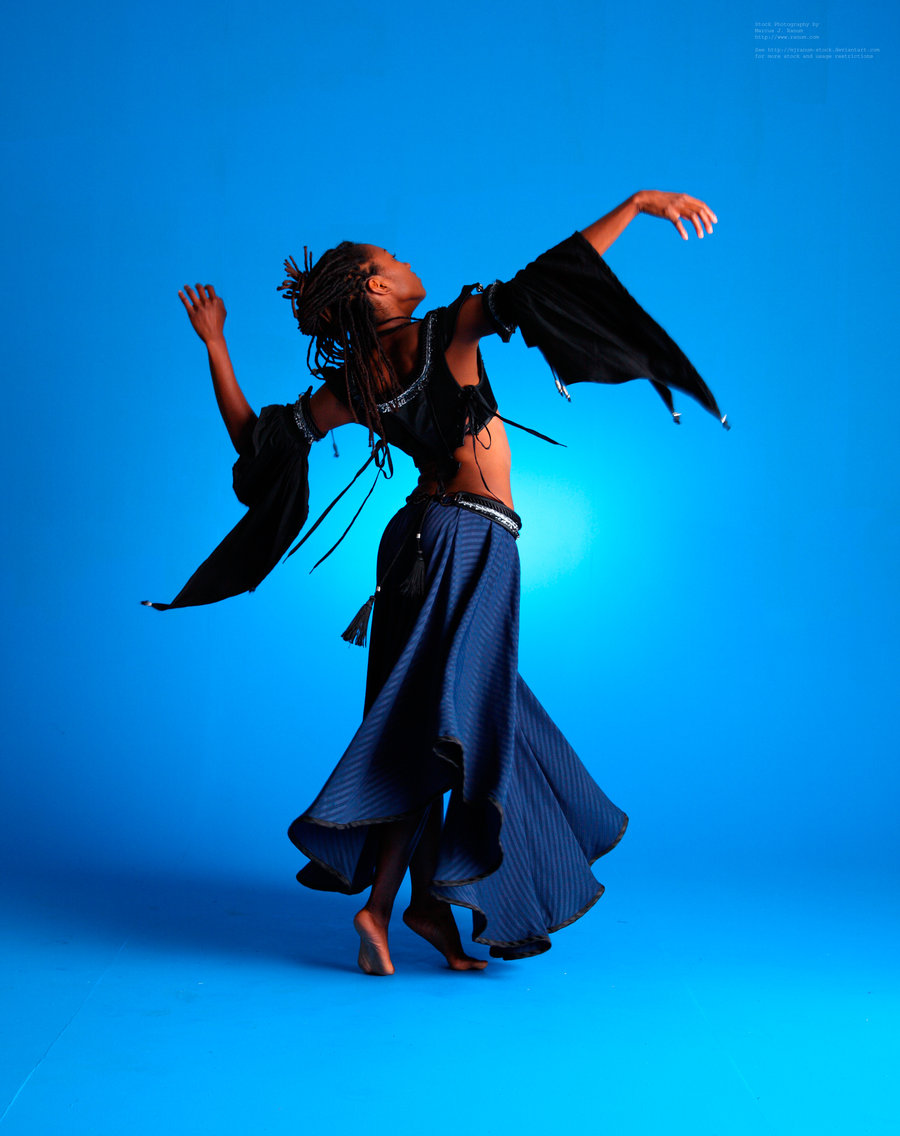
Photo from SketchDaily
To draw dynamic poses, use photos of people in motion, taking actions such as falling, jumping, or kicking a ball. These references can help you capture movement and energy in your illustrated character designs. Luckily, with the internet, you can find thousands of photographs capturing every type of movement.
You can also go to figure drawing reference sites, such as Line of Action or Croquis Cafe. Drawing from memory can be hard if you don’t understand human anatomy and how it moves. Using references can help you draw dynamic poses more easily.
When first drawing a concept character design, we tend to try to capture all the details of their face, body shape, and clothes. However, that focus on small details often comes at the expense of creating a lively and dynamic figure.
My second tip is to use a stopwatch and draw the same pose several times at varying speeds. Start with quick sketches and gradually increase the time spent on each character design drawing. Begin by drawing your character in 20 seconds, before extending the time spent to 1 minute, and then 5 minutes. Finally, take 10 minutes to draw the most detailed version of your character.
Practicing this technique will improve your skills, because it will make your hand more comfortable with speed. Drawing a character quickly, such as in 20 seconds, can help exercise your brain and memory., This is because with only 20 seconds, there is no time to refer to a reference. Instead you’ll need to keep the pose in mind while you draw it on paper.
As your time intervals increase, you can add more details to your model, such as clothes, accessories, and facial expressions.
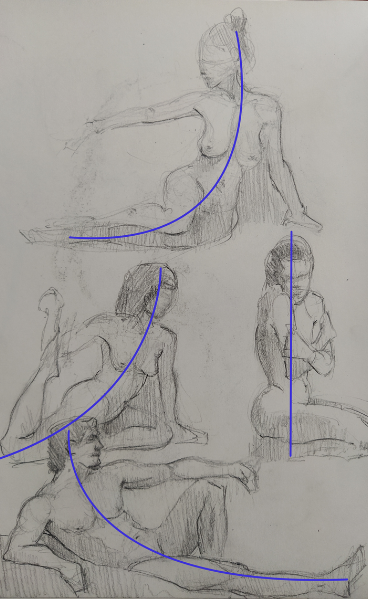
My third tip is to use lines of action, which capture the overall movement of a character. A Line of action is a curved line that generally stretches from head to toe, conveying a direction of movement or an action. The concept artist draws this line before drafting the character’s body to ensure that the pose is dynamic.
You can see examples of lines of action in the character concept sketches below.
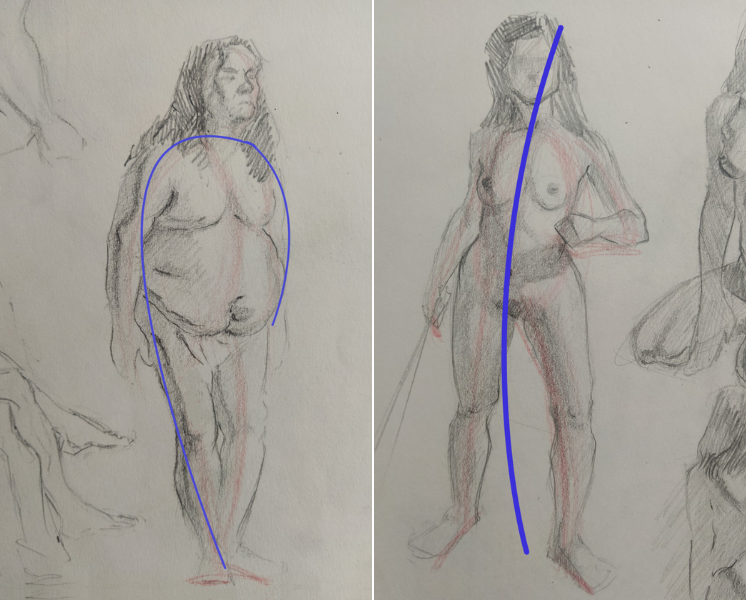
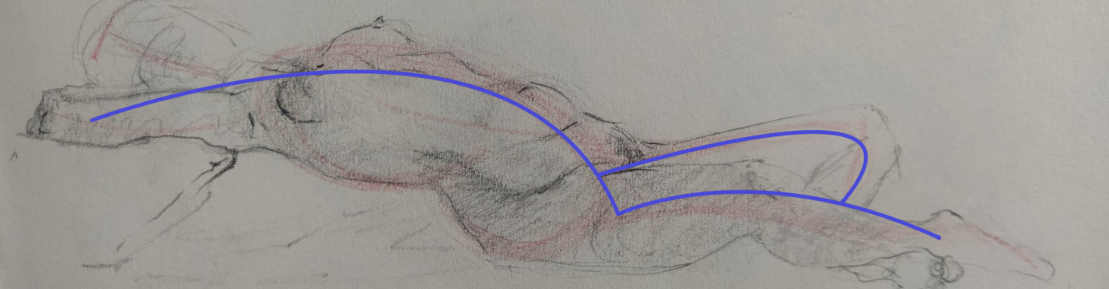
Movement is often easiest to express through simple shapes. Using shapes to draw characters is an important part of learning to draw. Animators and illustrators have different techniques for creating these shapes. I personally found the FORCE drawing method to be the easiest way to understand how a body in motion works. Using this method, I saw a significant improvement in my drawings.
Using some visual examples, I will show you how I use FORCE to draft my own characters. You can see how I use this technique to draw a torso, using simple curved lines to connect the rib cage to the pelvis.These lines, called “directional forces,” combine to form “rhythms”, creating balance in the figure.
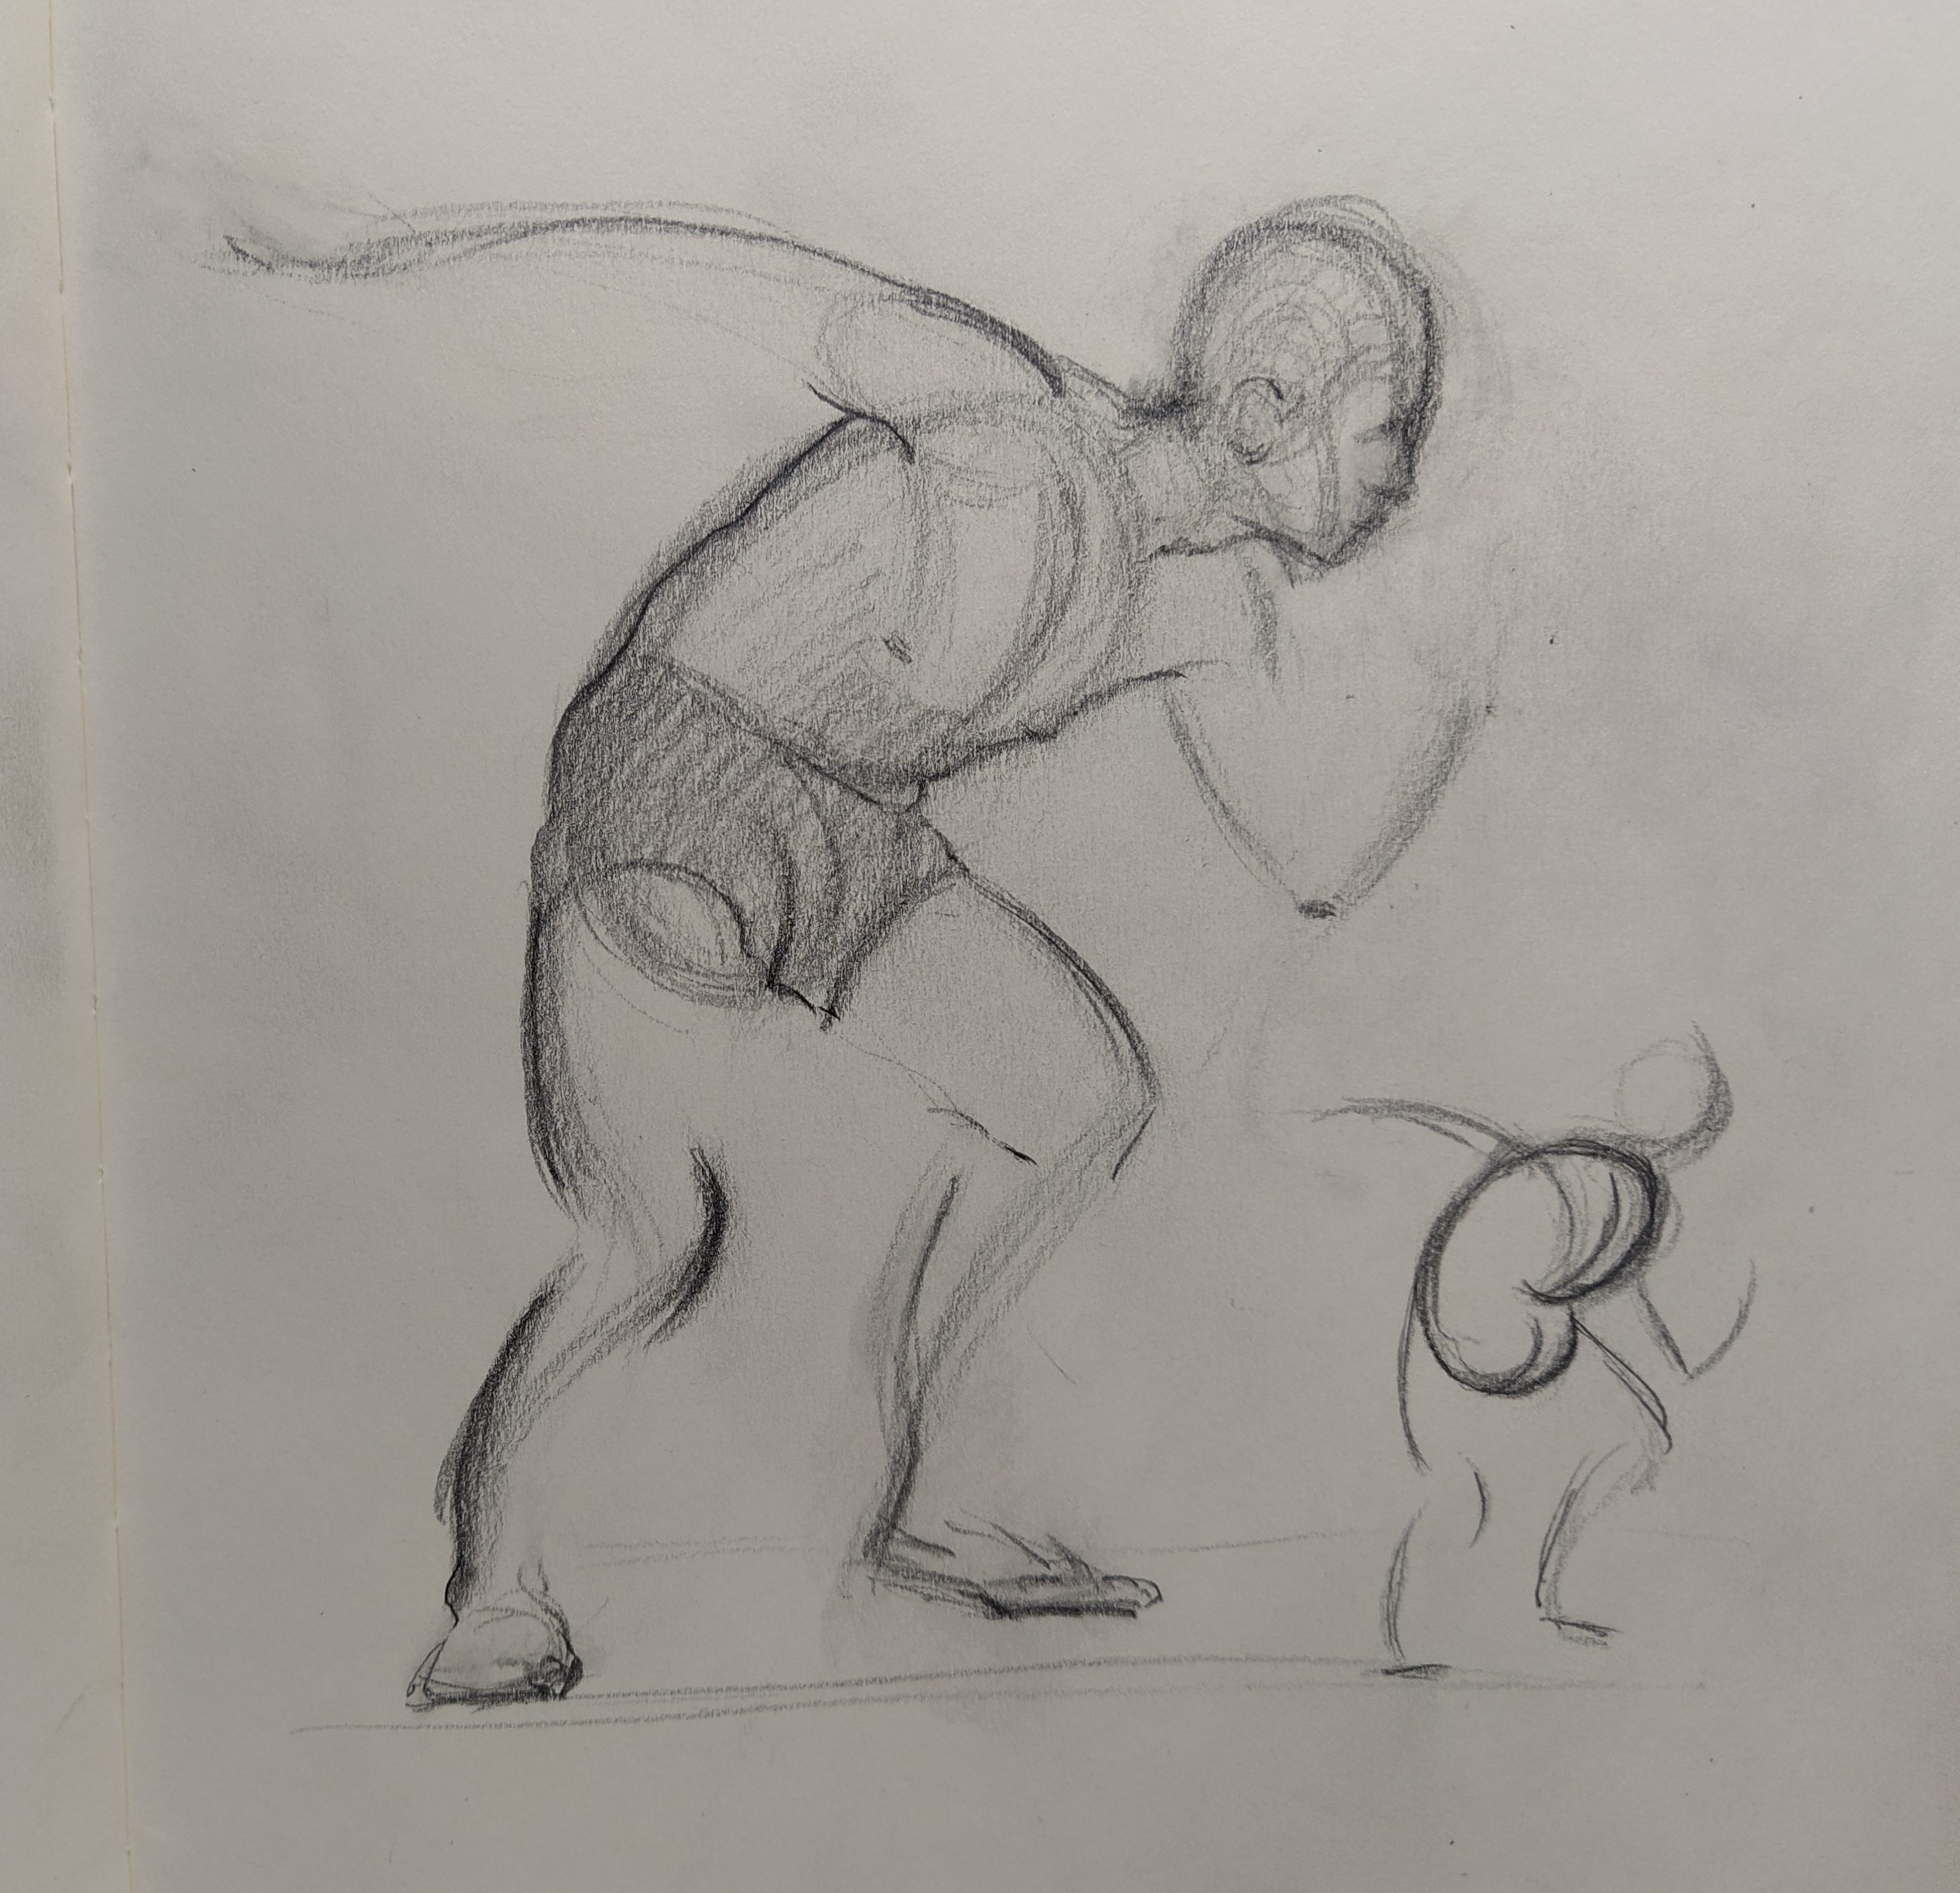
In the sketch below, you can see that a C-shaped torso makes a character look as though they are flexing.
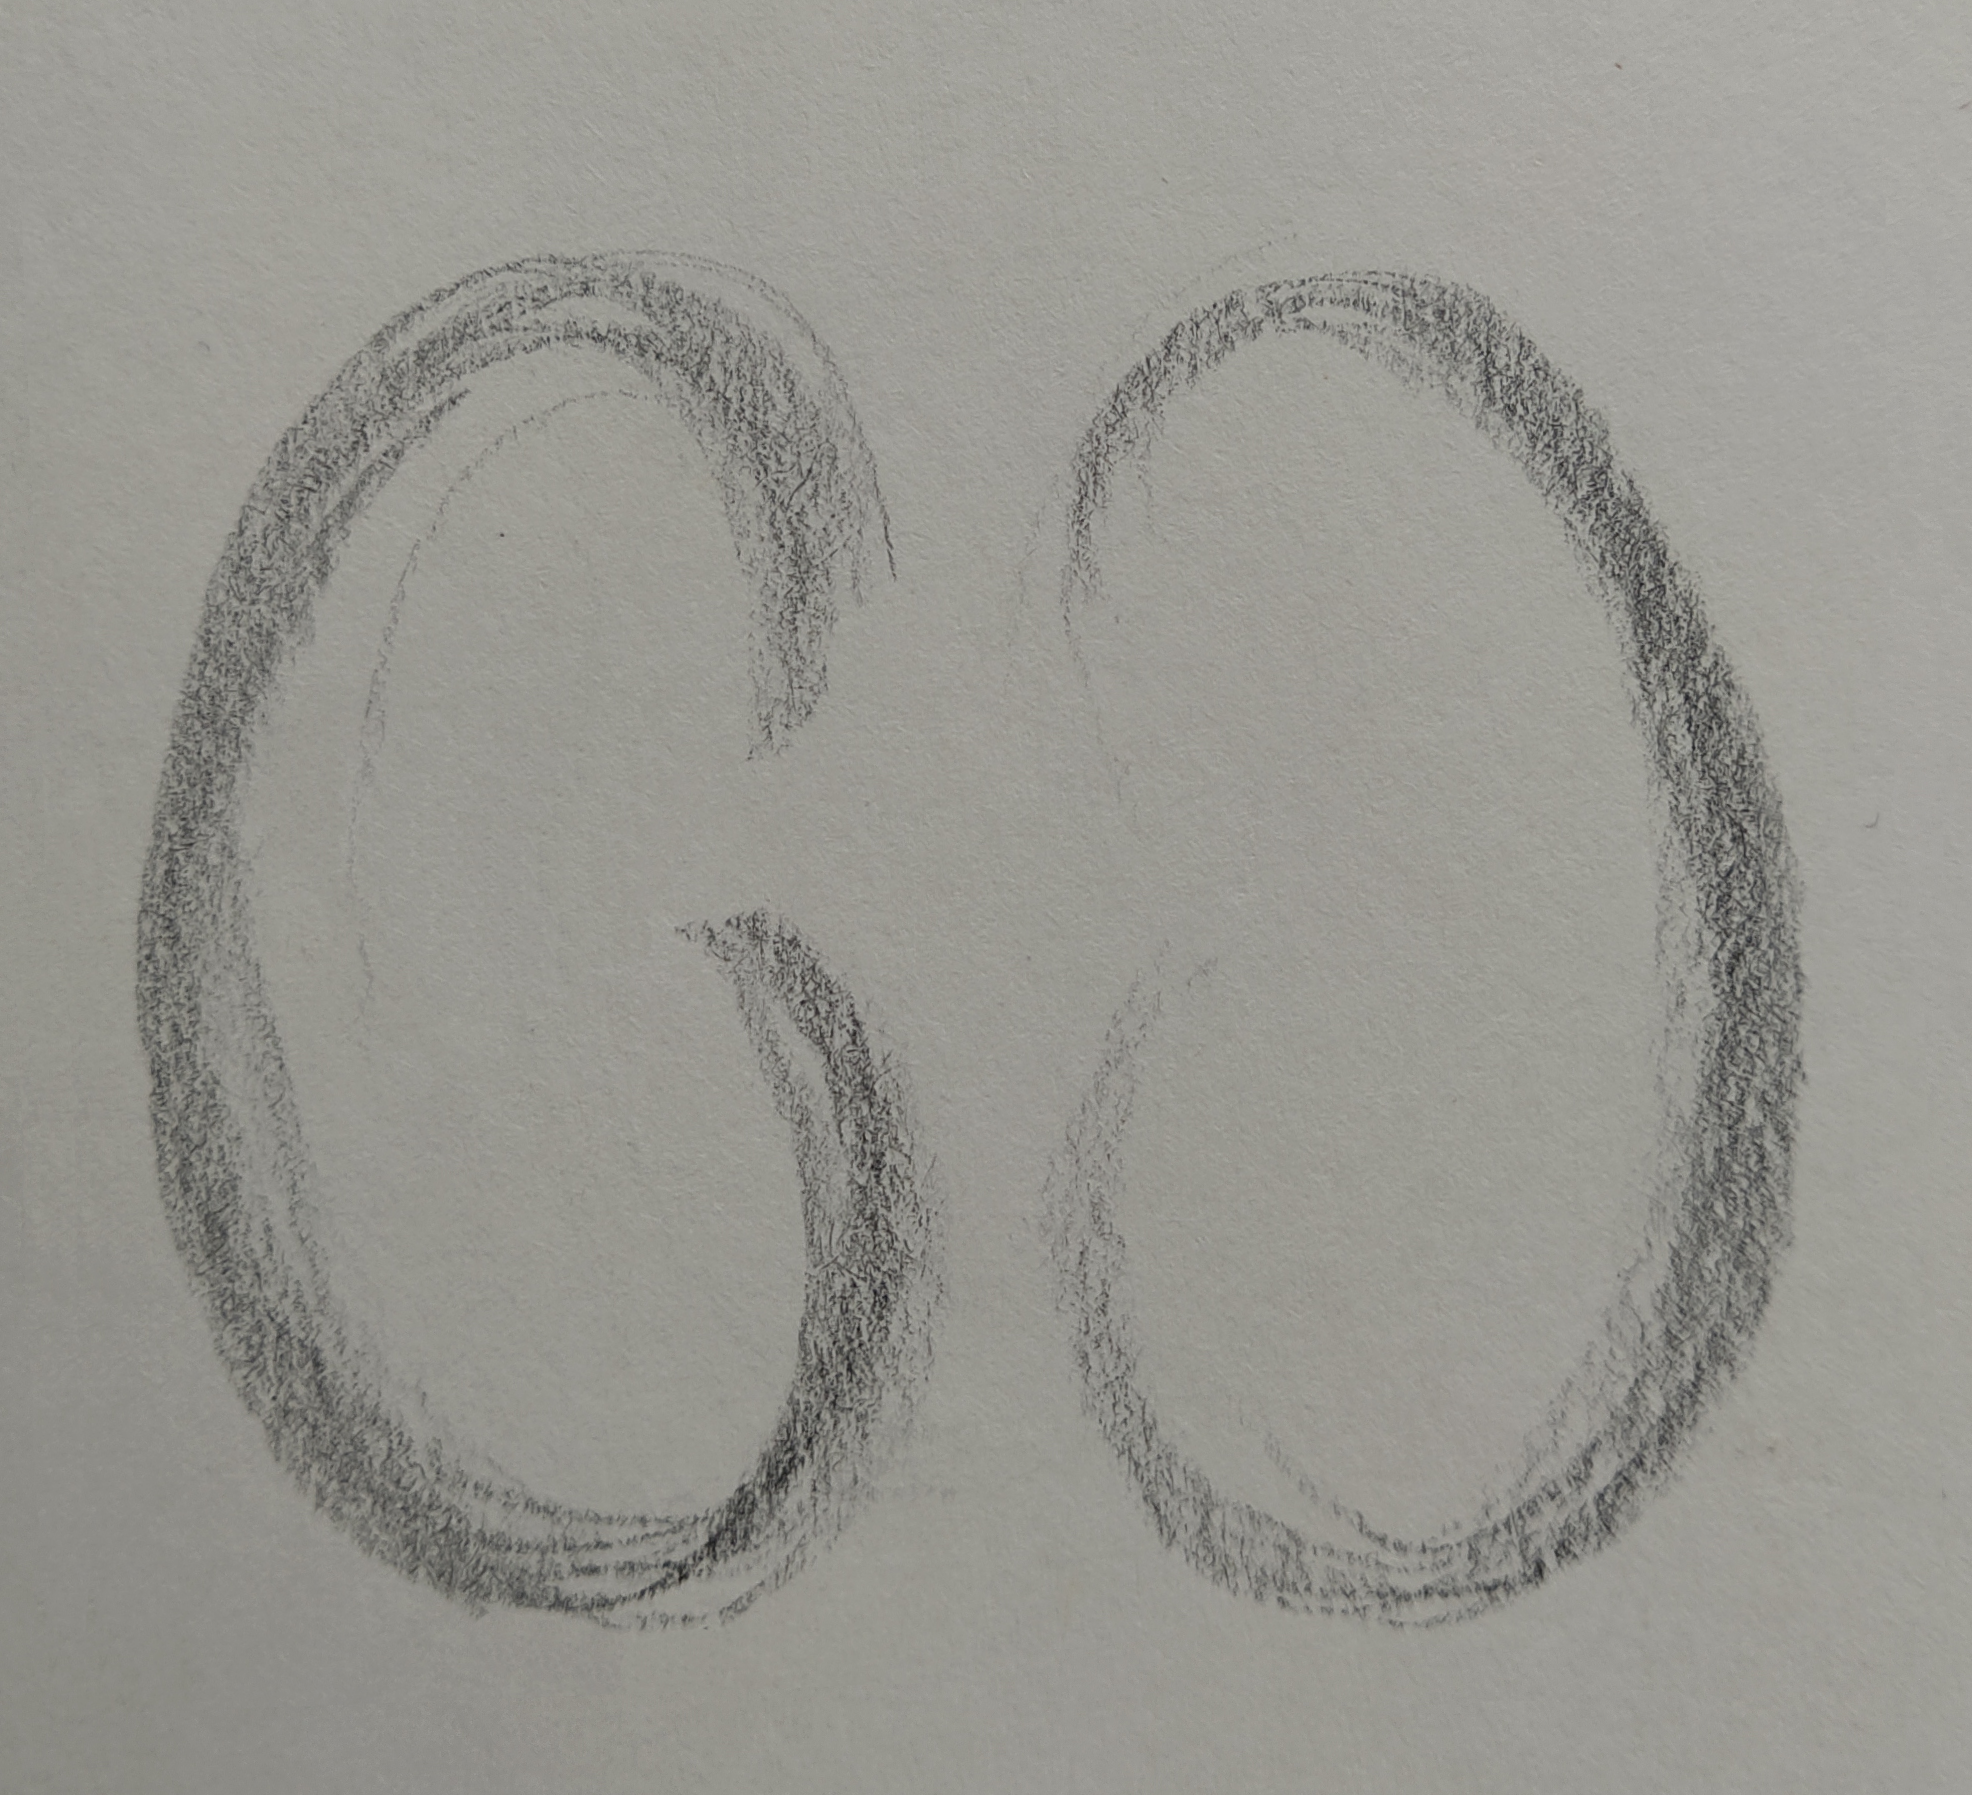
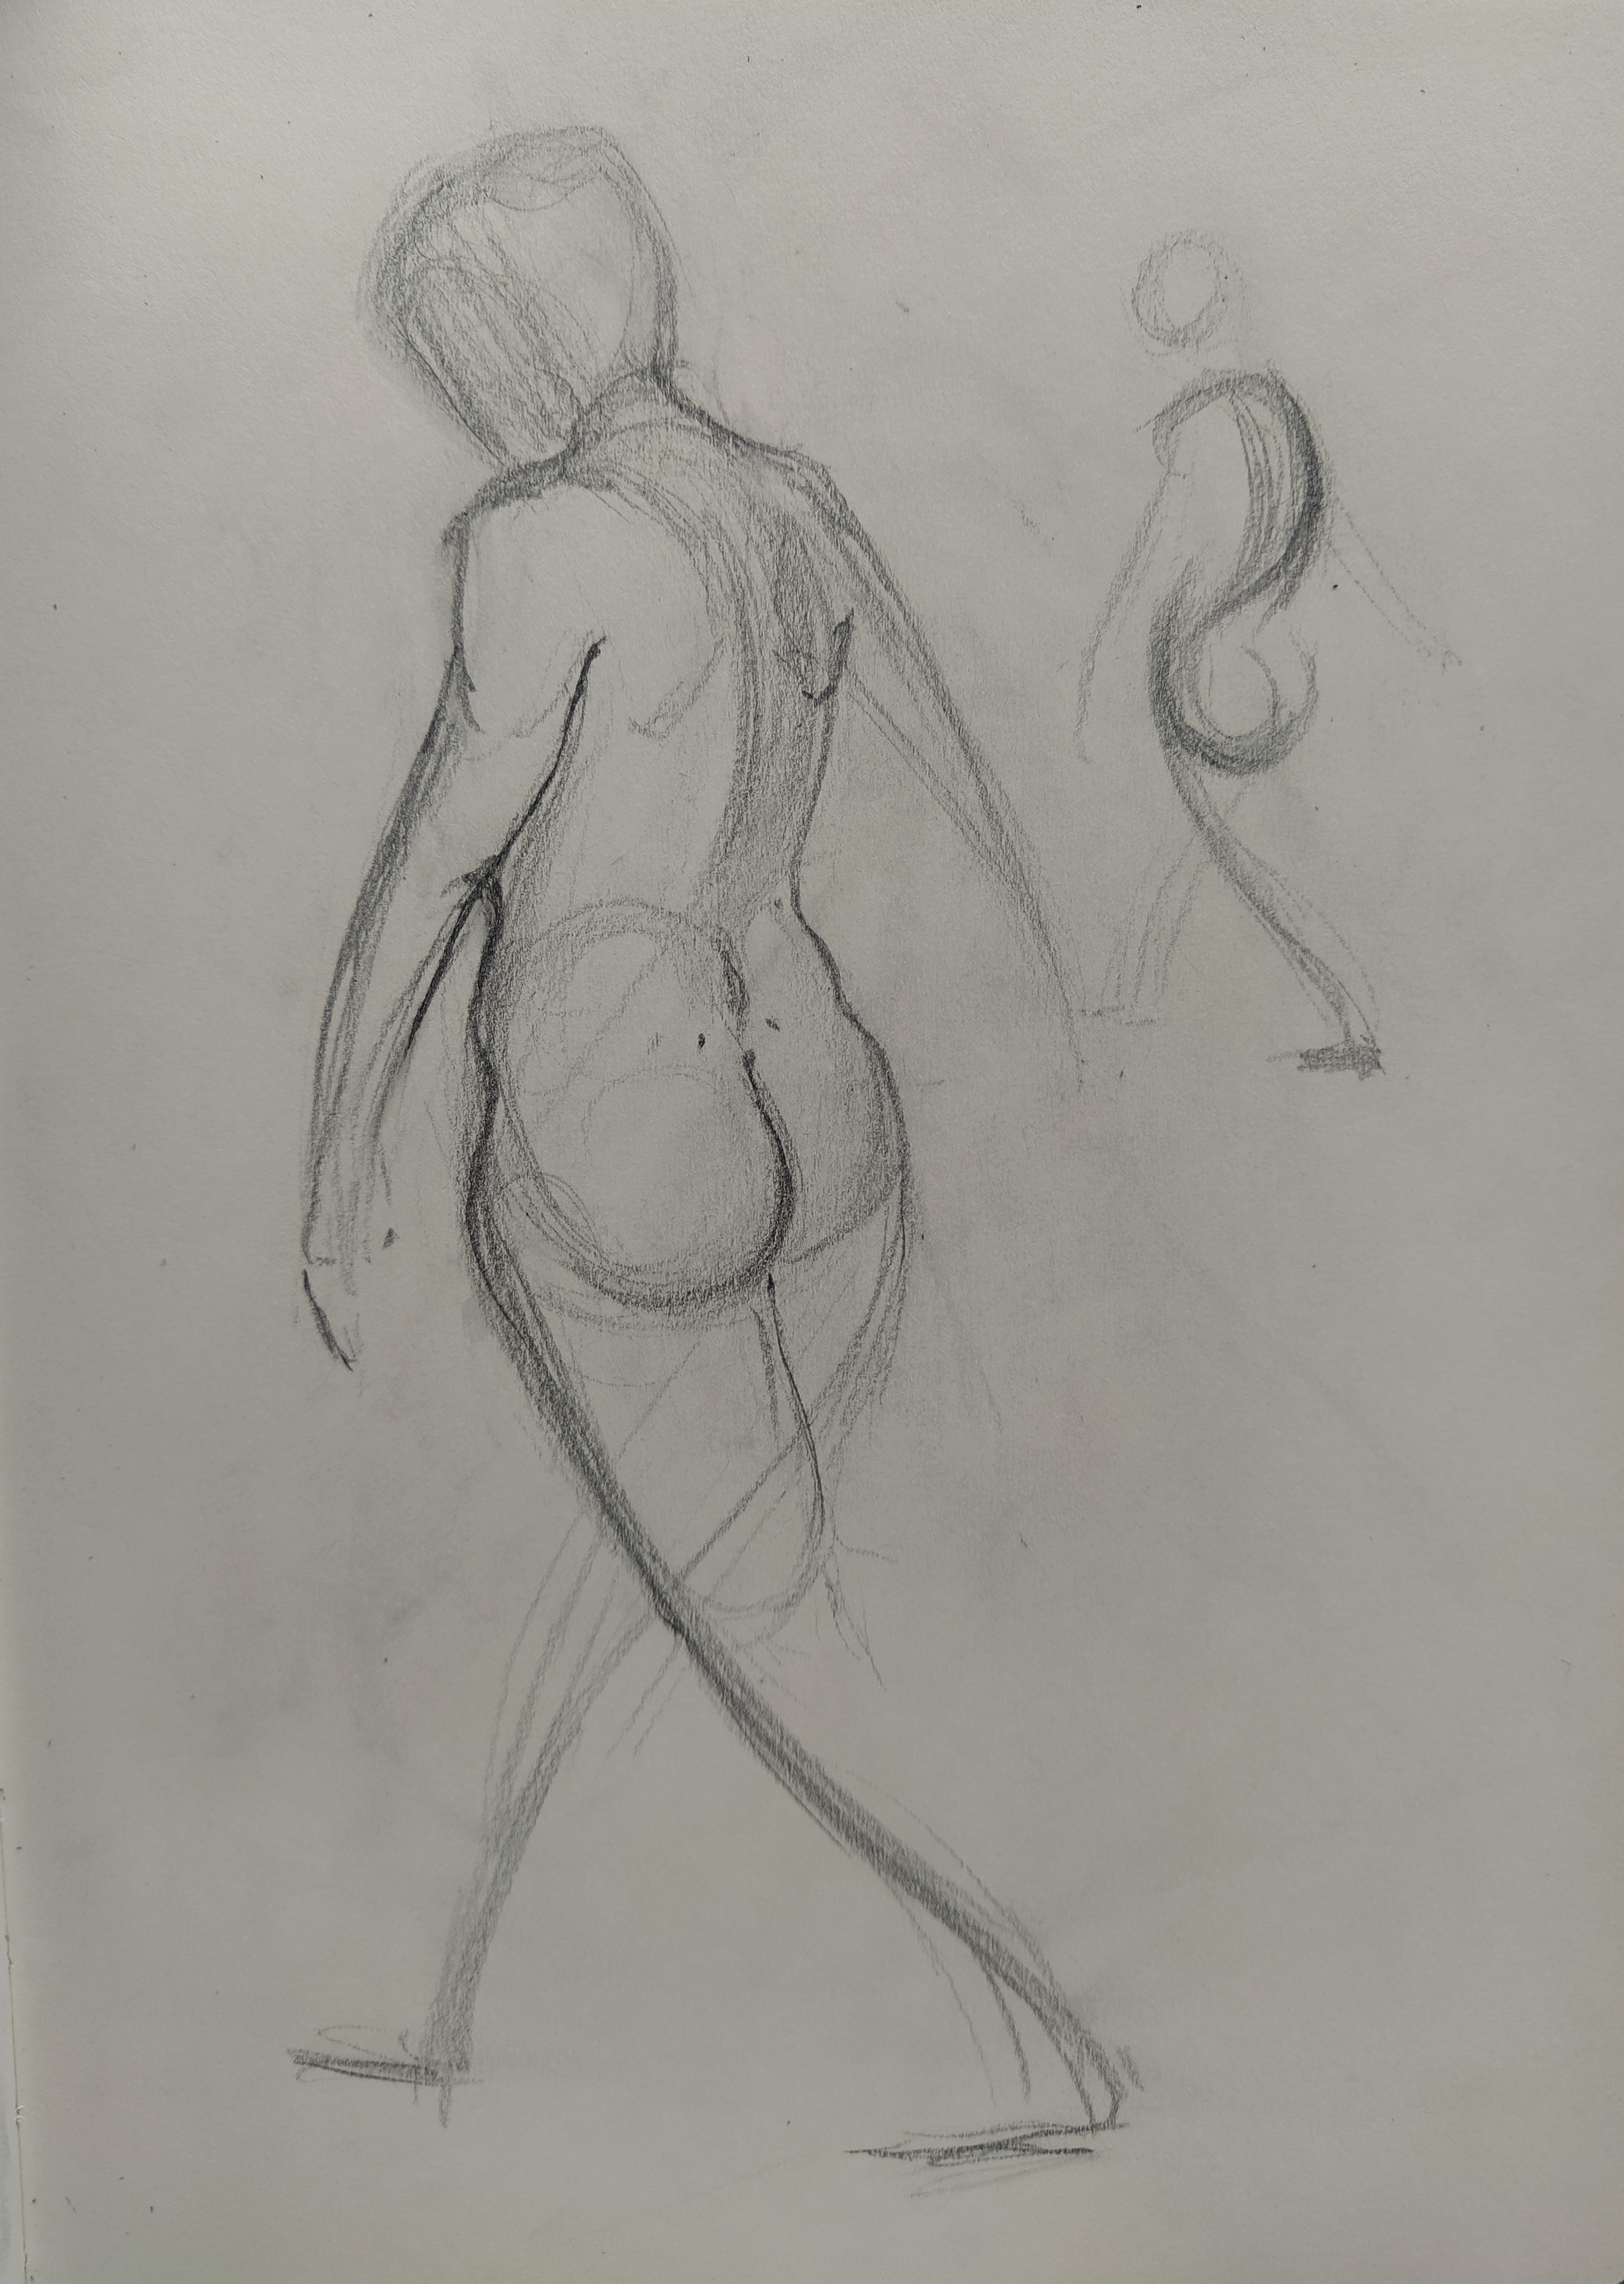
In this second sketch, you can see how drawing an S-shaped torso might be useful for drawing a more sensual or feminine pose.
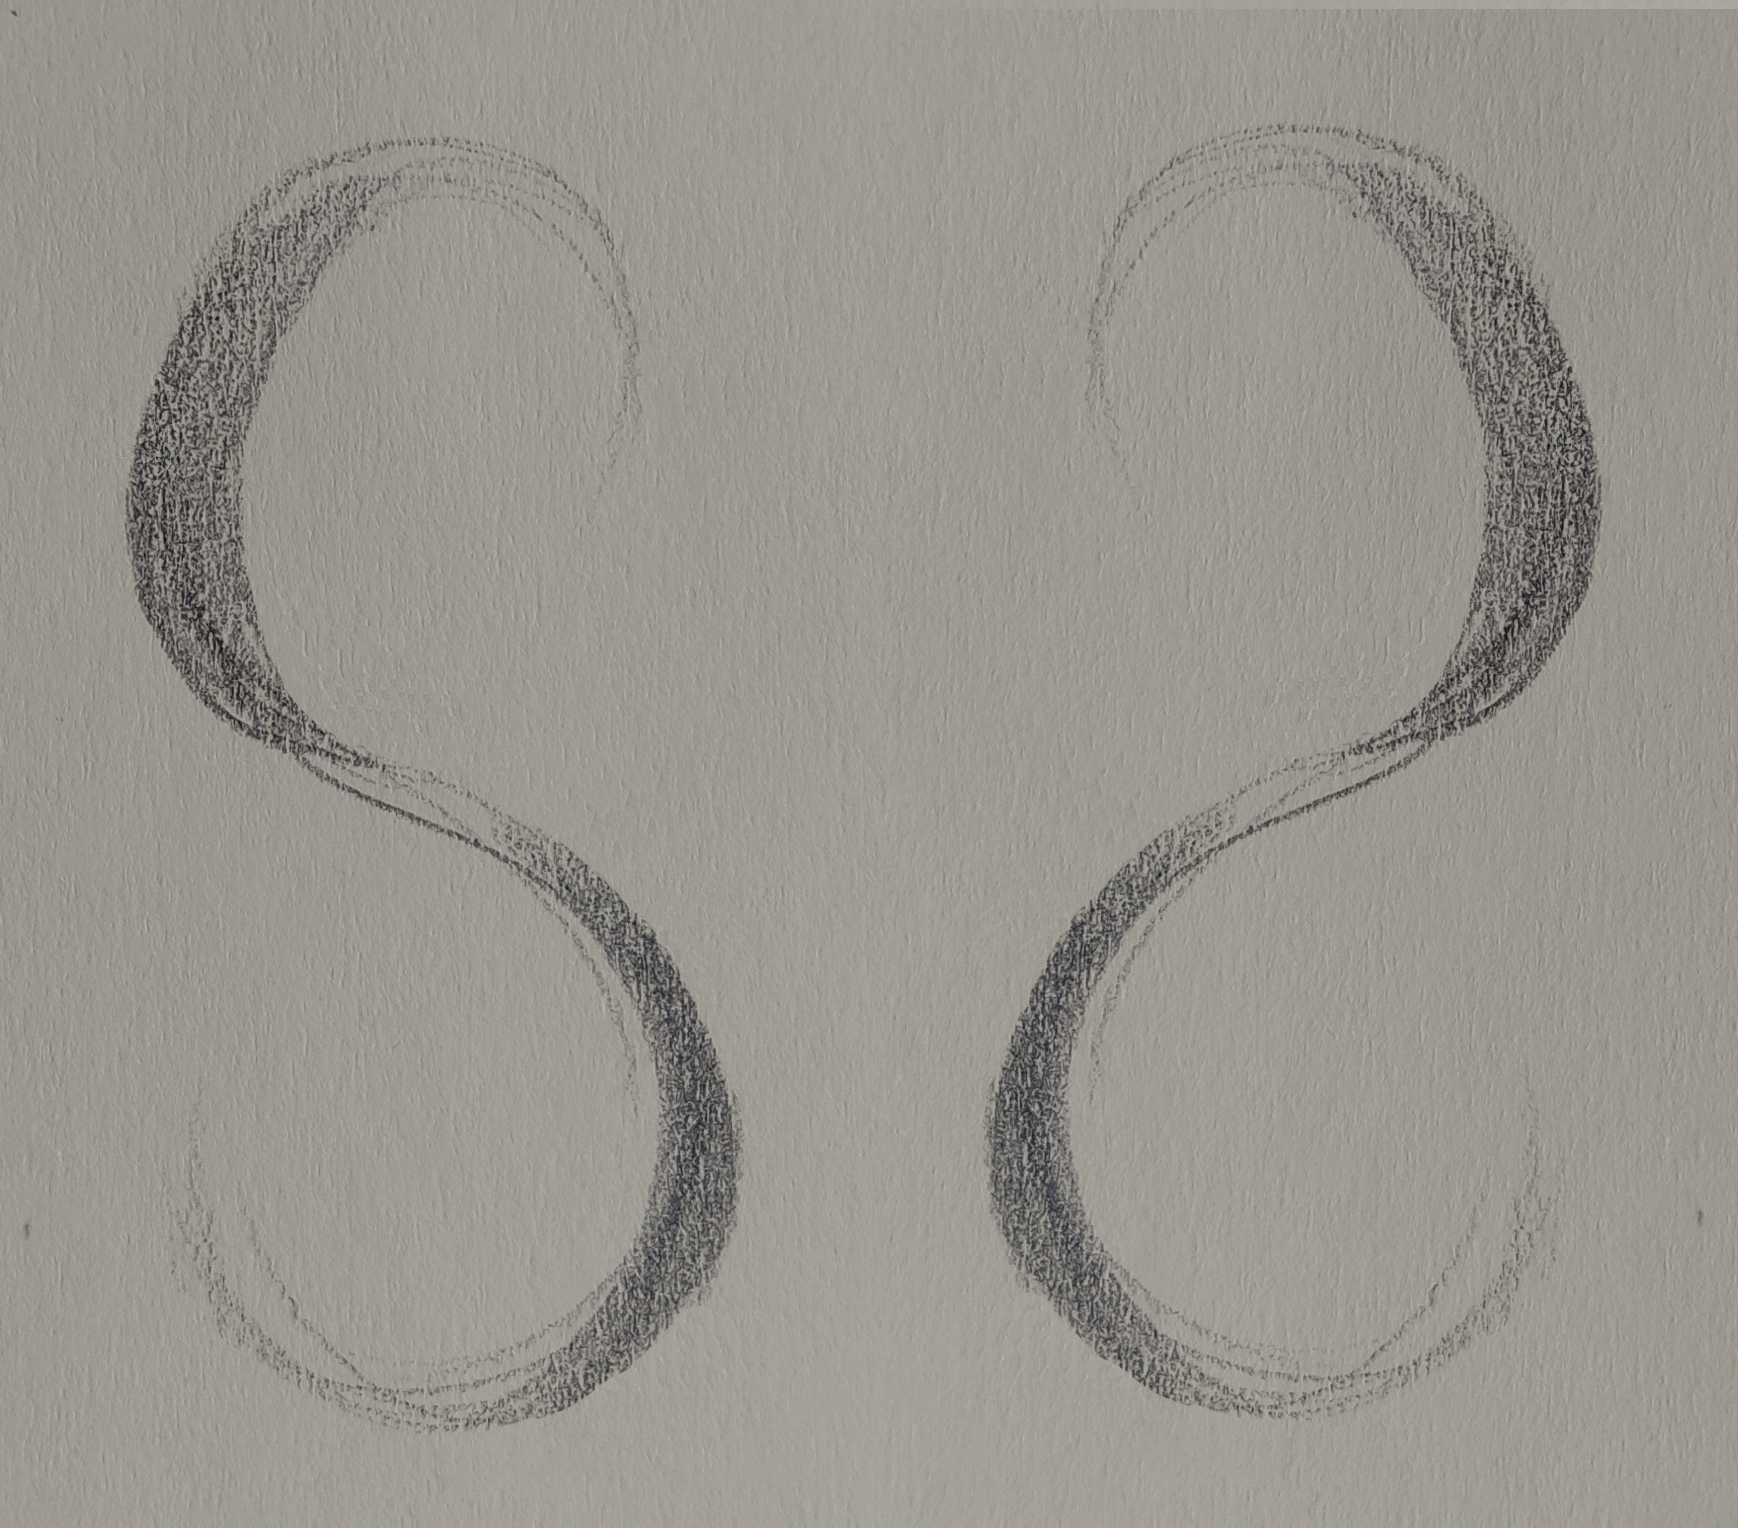
Tip #5: Pay Attention to Perspective
When drawing character sketches, we need to consider perspective. To put it simply, you can create a depth effect by having one line stop when it touches another. You can also add depth by making distant parts of your character more faded or blurry than those closer to the viewer. You can see a visual demonstration of this in the image below.
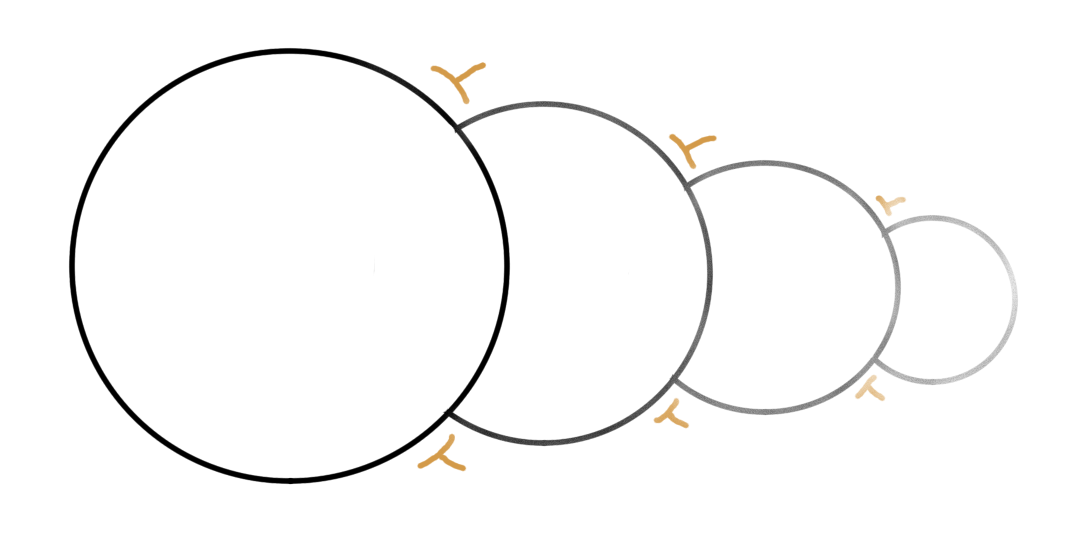
Let’s discuss how this applies to a character’s lower body.
When drawing a character’s legs in profile, the force usually flows from the front of the thigh to the back of the calf, like a flexed leg. This helps convey the bend and natural movement of the leg. For example, when a character is walking or running, these lines help emphasize their movement and weight distribution.
If the character is facing the viewer, you can see three directional forces: one from the hip to the knee, one from the knee to the ankle, and one from the ankle to the foot. These lines show the leg’s structure, support, and stability, helping to depict the character’s stance
If the leg is fully stretched, such as when a character is standing on tiptoe or kicking, it can be shown with a single directional force. This line runs straight from the hip to the tip of the foot, emphasizing the extension and tension in the muscles. It simplifies the leg’s movement and makes it easier to animate the transition between poses.
Now that we’ve gone through my top five tips for creating good character design, let’s see them in practice.
The torso shows lateral flexion with a C-shape, stretching of the rib cage on one side and contracting it on the opposite side. I schematized the left leg in a single line, showing the force from the front part of the leg to the tip of the foot. The right arm provides perspective and depth, being blurrier and lighter than the rest of the character.

In this second example, I again used the C-shape to show how the back stretches as the character contracts their front. The right leg, facing the front, has directional forces extending from outside the thigh through the knee to the outer calf. I drew the left leg in a flexed position, with force moving from the front of the thigh to the back of the calf. The right armpit is drawn in perspective, showing that it is in front of the character’s back.
In this example, I used an S-shape to draw the torso, connecting the rib cage to the pelvis. I drew the left arm and leg with darker lines than the rest of the body, showing that they are in the foreground.
By mastering these techniques, animators can create more realistic and dynamic characters, or redesign existing ones to improve their animations’ storytelling and visual impact. I hope these tips help your creative process as you design your characters.
To learn more, check out this blog post on what to include in a character design sheet during the character development process, or this blog post about the character development process in animation.
Are you an animator looking for opportunities to get your character designs seen?
Animators are working with the world's biggest brands on Tongal.