

Remember when making your master deliverable was simple? You’d shoot your video at a 16x9 aspect ratio and finish that master deliverable at the same aspect ratio. Easy-Peasy. Then came social media and the headaches began.
With so many channels to consider, most clients now expect a 16x9 file to be delivered in multiple aspect ratios along with cut-down versions for social media. You could spend all your time making this incredible, wide-screen, 16x9 video only to have to then spend nearly as much time re-editing and re-formatting the video. Requested deliverables now are 16x9, 9x16, 1x1, and the new hotness, 4x5. And the trend of new aspect ratios will continue as new phones and social media applications come online.
Here, I’ll attempt to give you some friendly advice to think about when reframing for social media and show you some tools to help. But first, here’s a helpful graphic showing you the most common social media sizes and their nomenclature:
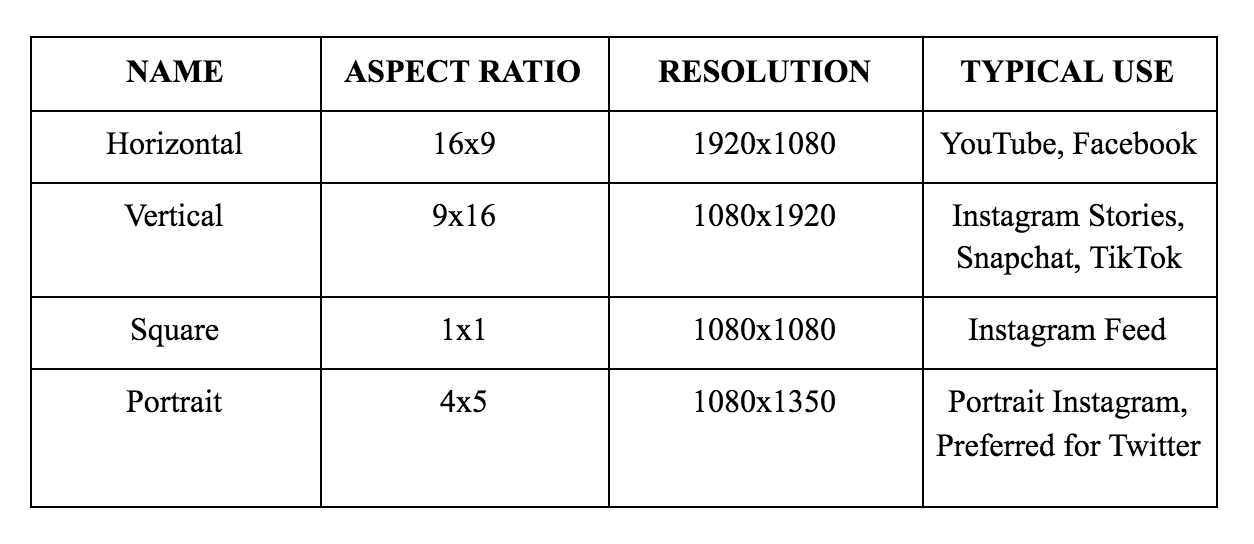
Facebook, YouTube, and others can accept files of any aspect ratio. But some platforms will need or prefer a specific size.
There are a number of web-based applications that will allow for scaling off of your original 16x9 video outside of your NLE. Sites like clideo.com, kapwing.com, animaker.com, and MANY more. These are great solutions but only allow for basic scaling and cropping. They don’t allow for reframing each shot or manipulation of graphics. For the best results, you’ll need your NLE. All NLEs will allow you to create a new timeline with the proper aspect ratio and nest the original clips inside.
But, Adobe Premiere is definitely leading the pack in this area with its “auto reframe” tool, which uses Artificial Intelligence to track subjects in your video to the new crop. It’s the closest thing to magic I’ve seen.
AUTO-REFRAME IN ADOBE PREMIERE:
Navigate to your original 16x9 timeline (or the timeline you want to manipulate):
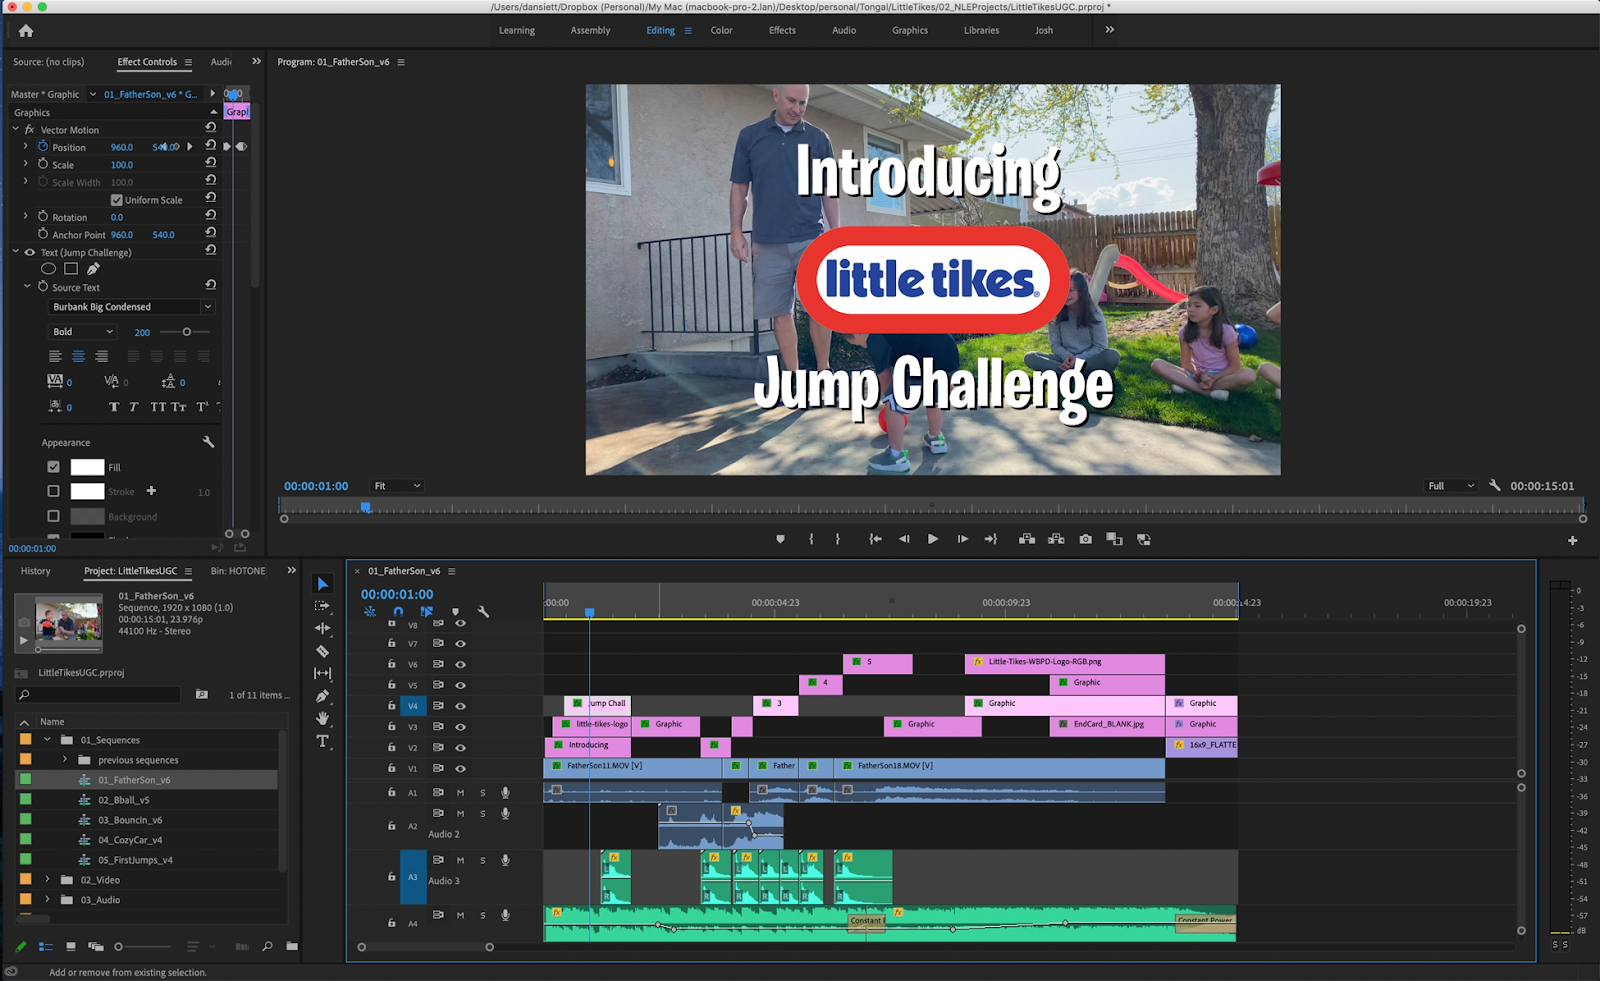
(See the final videos from this project here)
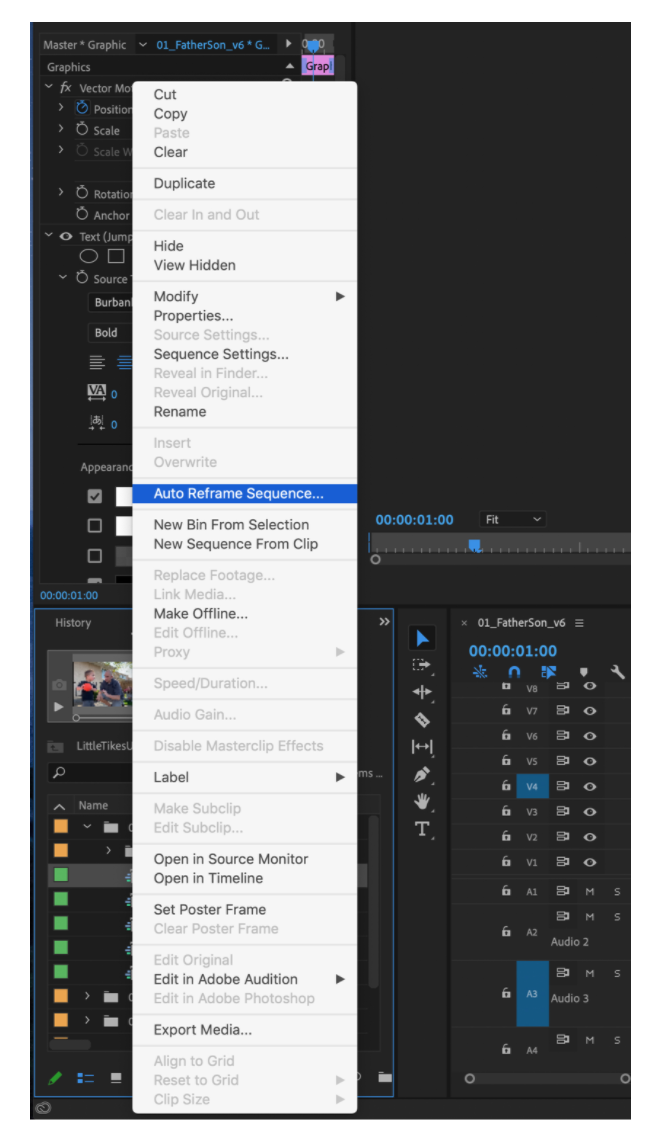
Right-click on the sequence name and choose “auto-reframe”.
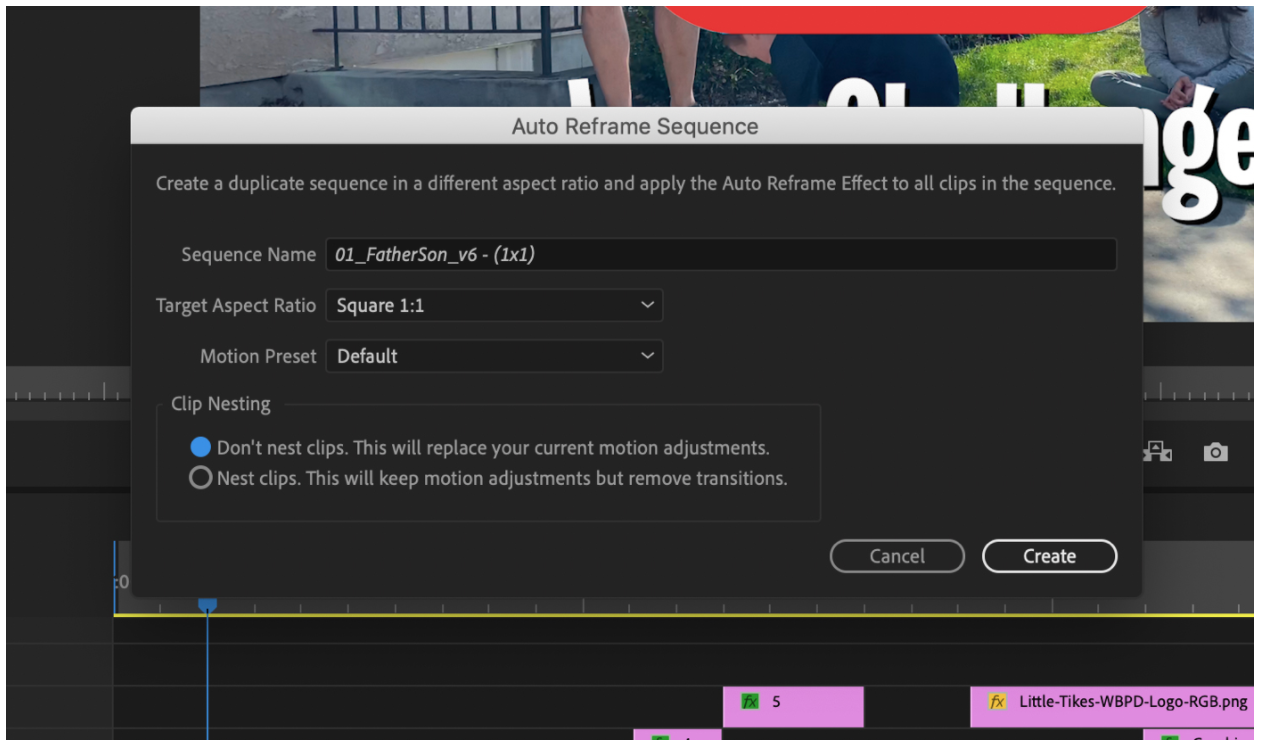
A dialog box appears, which allows you to choose several settings. You can change the sequence name and the aspect ratio.
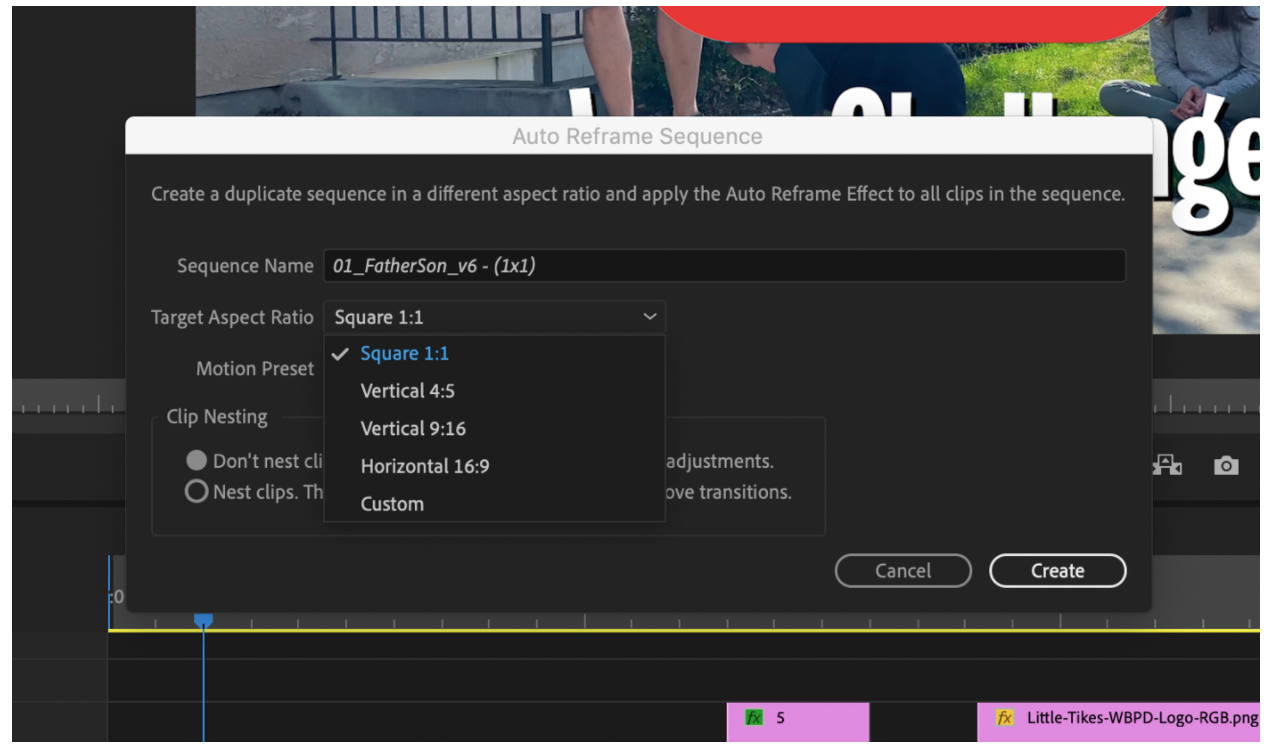
Additionally, there are different motion presets (honestly, I just go with the default). ‘Don’t Nest’ clips will allow Premiere to automatically track subjects and add keyframes.
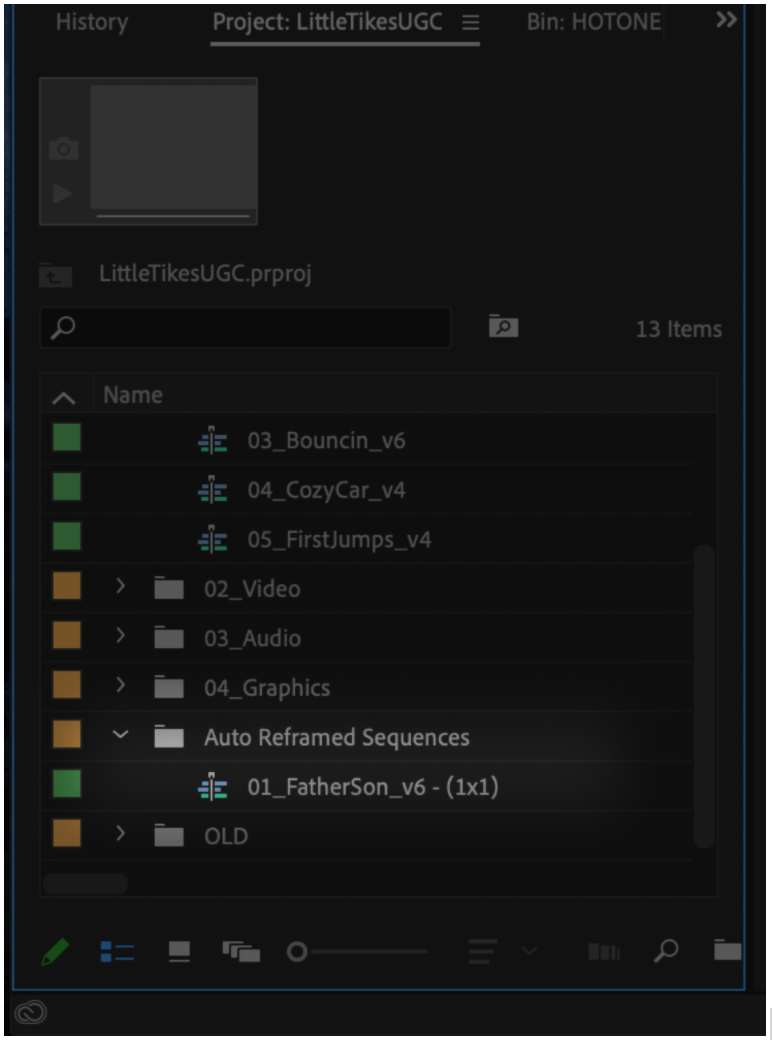
A new folder will be added to your project called “Auto Reframed Sequences” and your reframed sequence will appear inside of that.
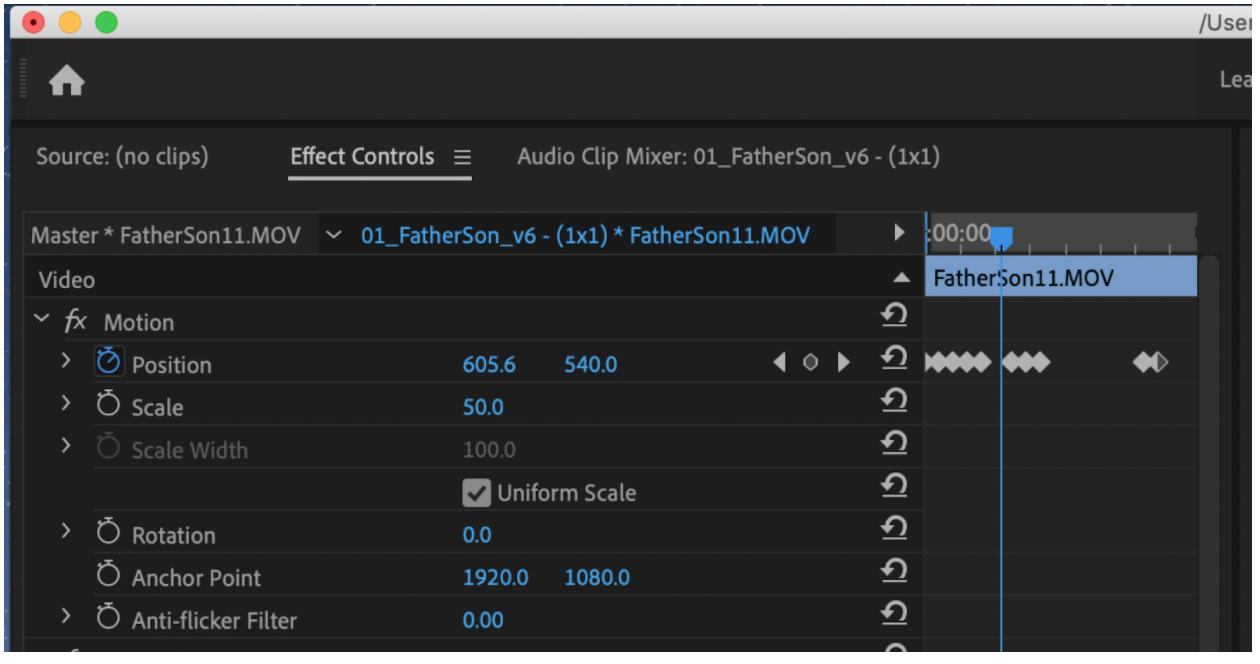
The software uses artificial intelligence to track the subject of the shot, adding tens or even hundreds of keyframes, repositioning the clips over time. Of course, you can delete these keyframes and reposition as you desire, but this typically works pretty well.
Sometimes the AI will get tripped up if there are multiple subjects moving in a scene, or if the scene is fast moving. Additionally, it doesn’t handle graphics too well. You will likely need to scale down and manipulate any graphic elements.
KNOW YOUR SAFE ZONES:
It’s important to be aware, especially in vertical sizes, of the app’s interface. For instance, on IGTV the bottom portion of the screen is filled with the play buttons, comment buttons, and other interface icons. TikTok or Snapchat also have this same setup. Be careful not to put important content in these areas, like subtitles. I recommend reviewing the content on the intended channel while editing to make sure nothing is covered by the platform’s built-in design elements.
CONCLUSION:
If possible, shooting in a higher resolution (2k, 4k) will give you a little more flexibility, especially for vertical content, so that’s something to consider before going into production. This is a process you’ll need to have a firm grasp on as a creator since most of your videos will likely need to be re-cut and reframed for social media and anything new in the coming years.
--
Note From Tongal: "Reframe Your Videos for Social Media on Adobe Premiere" is part of a series of Tongal Community-written blog posts that were originally sourced in the Tongal Blog Open Call Project. The views and opinions expressed in this article are those of the author(s) and do not necessarily reflect the official policy or position of Tongal. Read more Tongal Community-written posts here and then Pitch us a topic you'd like to write about for the Tongal Blog!