
Do you ever wonder how YouTubers churn out so many highly dynamic videos within days after filming? This, too, was a mystery to me, because whenever I tried to “edit like a YouTuber,” I ended up sitting in front of the computer for hours on end.
Videos on YouTube often include hundreds of jump cuts and effects, but achieving this look without knowing the right editing “hacks” can be time-consuming. Luckily, there are various techniques and software you can use to help you speed up the process.
Looking to move through your timeline faster? There’s a hack for that. Need to cut out all the long pauses in your vlog? TimeBolt can do that with a click of a button. Want to mimic the effects-heavy style of creators like SSSniperWolf or MrBeast? Look into Envato which offers bundles of effects and pre-made templates to elevate the look of your video. Below, I share my tips for streamlining the editing process. If you’ve got a time-saving hack of your own, please share it in the comments!
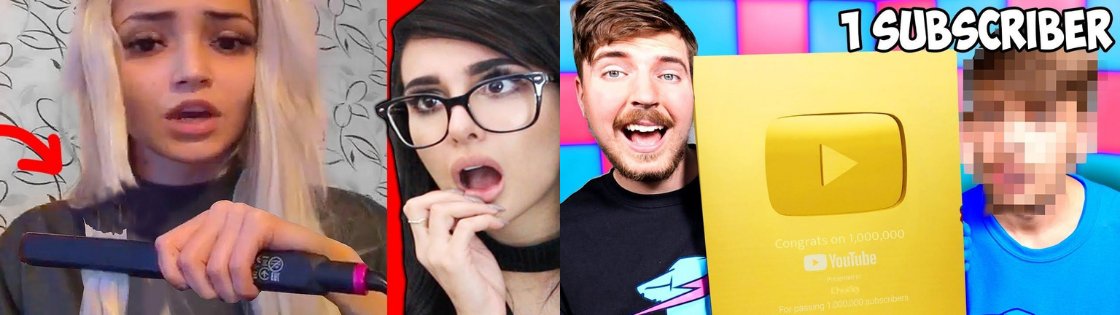
SSSnipelrolf and Mr. Beast
Remove Long Pauses From Clips Fast
To remove silences from your video without having to scrub the timeline, use software like TimeBolt, which will execute this process in virtually two seconds. For instance, if you recorded for fifteen minutes, but you only have four minutes worth of dialogue, TimeBolt will scan your clip, automatically create edits for the clip, and deliver a clip shortened to four minutes.
How does the software do this? You simply tweak the silence detection levels to instruct it what to identify as silence. For instance, when I edit, I tell TimeBolt that anything below 22.400 decibels should be treated as silence.
The next step is to import the new shortened clip into your editing software—in my case Adobe Premiere—so that you can edit as normal.
When you import the clip into your timeline, you’ll have the option to see it as a stand-alone clip or you can double-click it and see TimeBolt’s edits within that clip. If you do this, you will see many cuts, which indicate where silences were removed. This is actually my preferred method of editing because when I record videos, I do multiple takes of a single line of dialogue. So this allows me to remove the silences between takes fast so that I only have to listen to each take without having to sit through my pauses. That way, I can further edit the “already shortened” clip and remove the takes I don’t need.
Editing Options Within TimeBolt
Another cool feature TimeBolt offers is that it allows you to add transitions between cuts after the software removes dead-air or long pauses. For instance, it can add crossfades, or if you prefer, you can export the clip without transitions so it’s just jump-cuts.
TimeBolt Pricing
TimeBolt is not free. The cost for an annual subscription is $85, or $247 for a lifetime subscription. But if you are someone who edits on a regular basis, the cost is worth it. I promise it will save you hours of time every week!
Note: There is other software that allows you to achieve the same effect, so shop around to find the best program for you.
Add Custom Effects to Your Clips Fast
Removing dead-air fast is not the only secret for editing like a YouTuber, you also need to be able to add custom effects in bulk. For instance, let’s say you have recorded a video in which you are talking in front of the camera, and you want every other clip to be scaled to 125% in size for that “zooming in and out of the subject” effect (SSSniperWolf does this a lot).
Rather than add the effect to each clip as you edit, move every clip that you want to scale to 125% to another track so that you can add the effect to all of those clips at the same time.
Here, your clips to be scaled have been moved to a new track.
Once the clips are in place, add the scale effect to the first clip:
Go to scale in the Effect Controls window and set the Scale to 125% (yellow arrow in the image below).
Left-click on “Motion” to save your preset (red arrow in the image below).
Now, go to your “Presets” folder under “Effects,” select all of the clips on your timeline that need to be scaled to 125%, and then drag the preset named “125” to your clips. The effect will be applied immediately to all of the clips.
You can give a different name to each preset, as you see in this list of my presets.
Organize Your Timeline
The more organized your timeline, the more efficiently your edit will go, saving you precious time in the long run. As mentioned above, a good rule of thumb is to move all the clips that need the same effect to one single track.
For instance, in the example below, we move all the clips that need to be scaled to 125% to the blue track, all the clips that need to be scaled to 150% to the red track, and the rest of the clips stay in the green track. That way, you only need to select the clips in one track to add the same effect to all of them at once in just a couple of seconds.
Another way you can make your life easier is by changing the layout of your editing workspace. For instance, when you first start a project in Premiere, the default layout shows your project folder right next to your timeline. However, you can move your project folder to a different part of the screen to enlarge your timeline, and that way things on your timeline are easier to work with and you can move through the sequence faster.
All you need to do to move your projects folder is to click on the “Projects” tab and drag it wherever you want to have it.
The green arrow points to where you need to click to move the Projects folder.
Markers Are Your Friend
You can also speed up the process by adding markers to clips that you need to come back to at a later time, whether it is to add an effect, to add text, or to edit further. To add a marker to a clip, simply press “M” while that clip is selected.
And instead of zooming in and out of the timeline to see where your markers are, simply go to the beginning of the timeline and press “Shift + M” to move from marker to marker. Not only does this save time because you won’t have to scroll through the timeline to find your markers, but this will also make it easy to edit all your clips with markers back to back, which will speed up the entire editing process.
Keyboard Shortcuts
To edit fast, you have to move fast, and these three keyboard shortcuts will allow you to do just that when moving clips in your timeline and when reviewing your edit.
Select all clips to your right or left: Press “A” to select everything to the left. Press “Shift + A” to select everything to the right. This allows you to quickly select all the clips to either side without having to zoom out of the timeline and without having to use your mouse. Trust me, it saves time!
Move clips up or down without moving sideways: “Ctrl + A + up or down arrows”. This allows you to move clips without having to use the mouse, which can often cause you to accidentally move the clip sideways.
Watch your sequence faster: Click the spacebar to play your sequence and then click “Shift + L” to make it go faster. You can press this command multiple times to make it play even faster. This will help you speed up the review process. It’s just like watching a video on YouTube at 1.25 speed or double speed.
Other Effects
You can also speed up the editing process by purchasing bundles of effects—such as transitions, sound effects, visual effects, and more—from websites like Envato. Having pre-made effects that you can’t find in your editing software can help make your videos look more interesting in just a few seconds—because all you have to do is select the pre-made effect you want to use and drag it to your clip.
Finishing Your Project
Whenever you find yourself noticing that certain editing tasks become repetitive and time-consuming, take a moment to see if there is a quicker way to get it done. A Google search might just turn up a hack for your problem; whether it’s a keyboard shortcut, a preset, or something else. Avoiding editing burnout will help you stay motivated and keep on producing awesome projects for the world to see.
Do you have a favorite editing hack? Let us know in the comments!
__
Note From Tongal: "How to Edit Like a YouTuber (FAST)" is part of a series of Tongal Community-written blog posts that were originally sourced in the Tongal Blog Open Call Project. The views and opinions expressed in this article are those of the author(s) and do not necessarily reflect the official policy or position of Tongal. Read more Tongal Community-written posts here and then Pitch us a topic you'd like to write about for the Tongal Blog!