Over the last 20 years or so, the lines of expectation between more rough-and-ready videography (news/corporate/vérité documentary) and the more gilded images of narrative film have blurred quite a bit. People expect more cinematic images in what used to be the most utilitarian videography. But as much as those artistic expectations have changed, the utilitarian timetables have definitely stuck around.
I’ve worked 17 of those 20 years––the last 7 being mostly in public relations. Visually, your clients want the best. Logistically, most of my clients and producers used to work in news, so they want things fast. Sometimes, even a tripod is an extravagance! So how do you navigate those situations? Here are a few tips and tricks—in the field and at home—that’ll help you do just that.
1. Think in Terms of Individual Shots
Most of you probably grunted a “duh” when you read that. Thinking in terms of shots is one of the most literal descriptions of what we do. But in this context, it has less to do with what you intellectually know and more to do with what gets thrown in the backseat when you have 10 minutes to shoot a classroom in session or press conference B-Roll. What gets thrown in the backseat is care, because adrenaline has jumped behind the wheel. That guy Adrenaline, he wants you to “spray and pray” that coverage—jerk that camera around in every direction as fast as possible, so your reptile brain thinks you’ve gotten as much footage as you can possibly fit into the few minutes you have. And your clients? They’ll love watching you do it, especially the ones with no real video experience: Check out that guy’s hustle! Wow, she really commits! And then they review the footage and all those compliments get immediately thrown in reverse.
So before Adrenaline even gets a chance to take over, take a breath and think about the shots instead of the ticking clock. Move quickly, but filter out the noise, focusing only on a sequence of shots will tell a good story. Wide shot, close-up, coverage of signage, people smiling…all separate usable puzzle pieces for the edit. It may take some practice to accomplish this both quickly and well, but it’s a practice worth committing to. The result: less footage overall (and fewer rolled ankles) than the spray-and-pray approach would yield, but way more usable selects.
2. Use the "Roll Step"
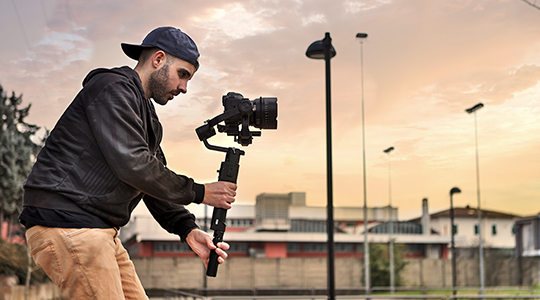
Fast operation of DSLR or prosumer cameras—especially without the assistance of rigs, gimbals or other stabilization—can result in some vertigo-inducing footage, even when you think you’re being super mindful. One way to use your body to minimize that chaos is the “roll step”.
Like all good handheld operating tricks, I learned the “roll step” in high school marching band! It’s designed to minimize the shock of your feet hitting the ground, so it doesn’t affect what you’re using with your hands…whether it’s a trumpet or an a7S.
First, get yourself some soft shoes…athletic shoes or some rubber or foam-soled dress shoes will do. Position the camera where you want it on your body and engage the muscles in your arms, hands and back to lock it in place, so that everything from your belt up all moves together as one unit.
Now the step! When you take a step, literally roll your foot from heel to toe in one motion (or toe-heel if you’re moving backwards), making contact fluidly with as much of your foot as possible. Think of your feet doing “the worm” with every step—only really fast!
SPOILER ALERT: You will look stupid doing this! See?
Forward, you look like a power walker who has to go to the bathroom. Backwards looks like the world’s worst moonwalk. But the result in your footage will be fantastic!
And if you have stabilization, still do that roll step—it’s only going to add to the smoothness. Roll step + MOVI = Butter! (Roll Step + MOVI + Slow Mo = The fancy Irish butter you get for Easter!)
3. Find Perspective with Murch's Paper Dolls
While the “roll step” is a great way to smooth out your operation in the field, Murch’s paper dolls are a way to do the same thing while reviewing your footage.
If you’re unfamiliar with the name, Walter Murch is a world-renowned film editor (Apocalypse Now, The Talented Mr. Ripley) who literally wrote the book on editing, In the Blink of an Eye. In the book, Murch lays out a little mental hack that helps him edit theatrical films on a tiny screen.
“One of the tricks I use to help me achieve this perspective is to cut out little paper dolls—a man and a woman—and put one on each side of the editing screen: The size of the dolls (a few inches high) is proportionately correct to make the screen seem as if it is thirty feet wide.”
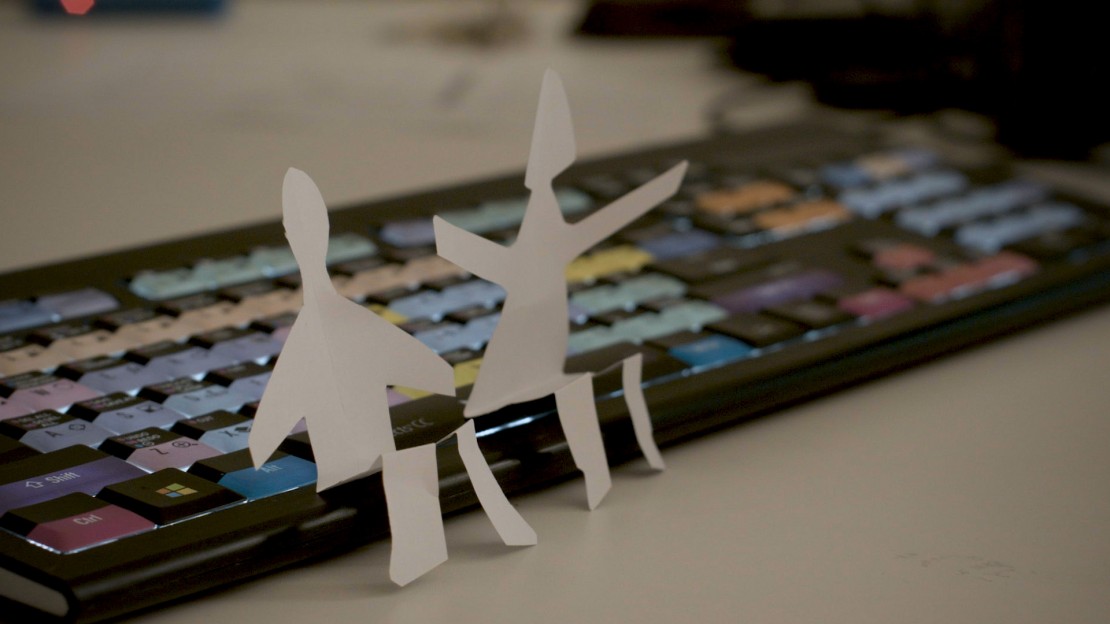
Photo Credit No Film School
This can easily be applied when reviewing your footage. Just cut out a few of those tiny dolls in proportion with your monitor and stick them on there when you’re reviewing footage (or if you’re comfortable, in the field). Here you can really process how you need to mentally “add weight” to your operation to make it more elegant, less shaky, and by extension, more cinematic. True, you might not be delivering for a theatrical screening, but a slower, more deliberate pace is always going to read as more “cinematic” even if your video is going to live on YouTube. Then make adjustments accordingly out in the field and track your progress over time.
Speaking of editing….
4. Learn to Edit
The most common criticism I’ve heard a field producer levy against an otherwise fantastic videographer—other than that they take too long to set up—is that their gorgeous images don’t cut. They’ll lean hard on one specific kind of shot, won’t move the camera, or will straight up ignore the basic visual grammar of the edit. Yes, the best possible shot is the best possible shot, but unless all you shoot is your own demo reel, you’ll have to know when to pursue the 2nd or 3rd best shot to tell a story in the editing room. How do you know what those shots are? Get in the editing room.
Cut your own stuff. Cut other people’s stuff. Massage amazing edits. Slog through ones where it isn’t all there. Nothing compares to the instinct for visual storytelling you develop while editing. And you bring those instincts into the field, “editing” your shots in your head while you’re shooting. This will help you not just get better material, but also make you more efficient and creative.
By the way, the nucleus of this advice–learn the work of others so you better understand the needs and wants of every step along the pipeline–can ultimately make you a better teammate, advocate, and even manager to other people working on your projects.
Applying these four tips will definitely smooth out the rocky and stressful experience that is on-the-fly-shooting. The upside is that when budget and timeline get a little more luxurious, these tips can still help you be more instinctive and efficient, stretching those dollars and hours into something truly impressive.
---
Note From Tongal: "4 Tricks for Improving Your Run-and-Gun Footage" is part of a series of Tongal Community-written blog posts that were originally sourced in the Tongal Blog Open Call Project. The views and opinions expressed in this article are those of the author(s) and do not necessarily reflect the official policy or position of Tongal. Read more Tongal Community-written posts here and then Pitch us a topic you'd like to write about for the Tongal Blog!