Pixar, Blizzard Entertainment, The Adventures of Jimmy Neutron: Boy Genius. When considering these companies and the visuals they create, the first thing that comes to mind for the average viewer is the characters or the story. But for creators like me, the first thing that comes to mind is the animation and its creation.
Artsy folk take into account the amount of labor and creativity applied to bring all our favorite characters and the worlds they inhabit to life. The lighting, the cinematography, textures, and the modeling are vital components that make this magic happen.
Modeling is one of the most important parts of animation... well, besides the animation. Without modeling you have no Buzz Lightyear, no Lich King, no Sheen and Carl. These are complex characters that take months, if not years, to design. They are our stars, but they aren’t the only thing that needs modeling. There are teams of modeling artists working behind the scenes on environments, props, sets, pre-viz work, and all the other mise-en-scène that make an animation feel real.
If you are just starting out in 3D art, or want to dabble in creating something in 3D for your next Tongal project, usually you start with hard surface modeling. Understanding how to create in a 3D program like Blender, 3DS Max, or my preferred option - Autodesk Maya, is useful for any artist. Painters can use it to lay out difficult perspectives, cinematographers can plan out their shots and manipulate cameras without spending millions on equipment, even medical students can navigate a 3D heart to practice for their future patients.
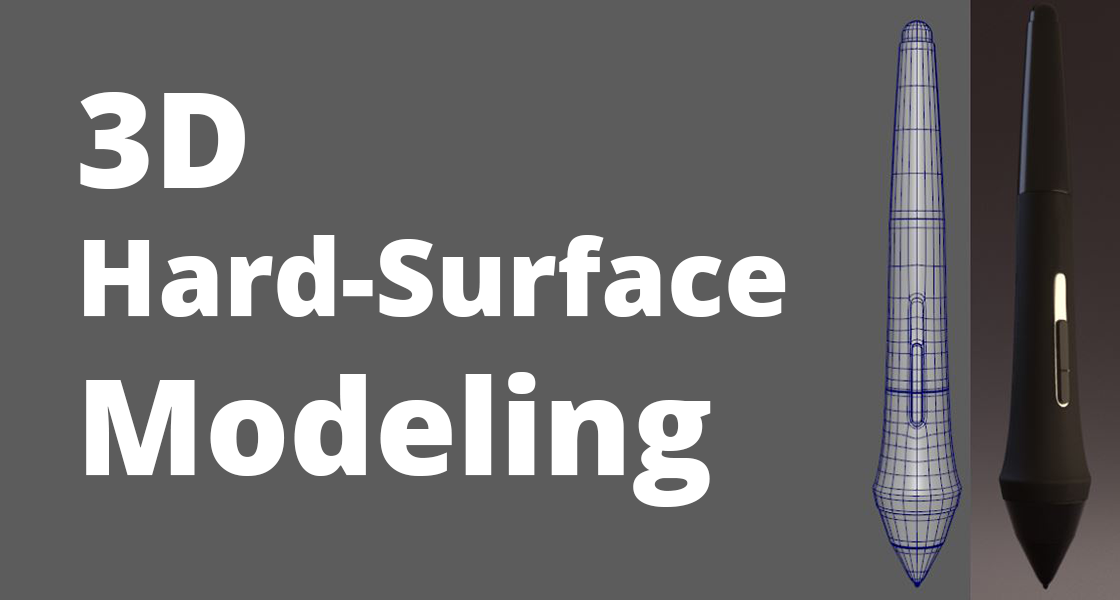
Modeling in 3D is just like sculpting or drawing traditionally; you start with the basic shapes and you keep adding on to them. Let’s start with a simple object many of us are familiar with - a digital pen from a Wacom tablet.
To begin, start with a basic shape, a long cylinder. Then apply a shiny texture - in Maya, a Blinn surface is a great one to start with. This high sheen texture allows us to check our edge flow while you are working. Smooth edges are vital. Any lines that are slightly off, crimped or crumpled will show up when the specular light travels across it.
When modeling, always work cleanly and concisely by minimizing your use of polygons or polys (the name for those faces or squares seen around your model). Objects that are more brick-shaped, give greater allowance to large flat panels with fewer edges or vertices. With a cylinder shape like this you may need quite a few polys to accomplish some of the details on the surface. It is a difficult balance to maintain, making sure you don’t have too many polygons that it becomes hard to work with - like sculpting Michelangelo's David with a toothpick, but also not to have too few either so that your pen ends up looking like a Lincoln Log. You can set yours up with about 20 subdivisions around the outside vertically, 7 horizontally, and give it about 4 on the cap, to help round it out. You will definitely need to add more later, but this is a good base to hopefully keep that balance.
Now you can dial it in a bit and start laying out the shape of the pen. Build-in some of that flare you see near the tip or nib of the pen by scaling edge loops. Ignoring the eraser button at the top, you have a portion about 40% of the way down and about 15% of the way up that encompasses the middle of the pen. This section is made of rubber or matte material. Try adding in a few rows and start manipulating the scale to get a foundation of the flare in the pen. To get the point at the end you can delete some of the edges at the end cap.
Next on the list is something called ‘fencing’ the edge, otherwise known as ‘holding’ or ‘fortifying’. What you are seeing is a polygonal pen in "smooth preview mode." This is a tool in Maya that works to average the distance between edges so that the shape is nice and smooth. When previewed, it appears to lose some definition in the corners. To counter this, you have to cut in extra edges close together to fortify that edge and give it a sharper look.
As a modeler you need to pay attention to the topology (surface) of your objects. You want a clean mesh to avoid any deformations.
To maintain the best topology, be sure to keep your edges razor straight, selections precise, and make all your faces 4-sided polygons. Good topology means the model will look fantastic and will deform well when animated.
Once you have created your cylinder, pushed out the edges to give it a flared shape, and reinforced some key edges, it’s time to go down the pen, adding another layer of finer detail. Look to see where there might be a lip, a change in direction, a portion where the pen may come apart in two pieces. On this pen in particular, there is an eraser that has a harsh edge that actually pushes into the pen.
There is also the rubber or matte portion. Around the upper-middle part of the pen, there is a small separation where the rubber is wrapped around the plastic body. The rubber itself has a seam on either side of the pen that runs parallel to the front button. There are also a few more inseams or cuts around the downward sloping tip. I created all of these details by either cutting in new lines and reinforcing your edges or by using other tools like extruding and beveling edges. These two techniques allow us to grab a ring of faces around your objects and push them inward like you had a lathe.
Working on hard surfaces or mechanical pieces, you can often benefit from the inherent symmetry. For the seam and the button on this pen, it needs to be identical on both sides. You can either struggle to eyeball it for even perfection; or you can just delete it altogether. When modeling, even on organic human models, it makes life significantly easier to delete half the model and mirror a copy over to the deleted portion. It is even possible to make your new copy automatically mimic changes made to your original model. This is a great solution for the pen button and seam. You can work on just the right half of your pen and you know the other half will look perfect. Then, when all the changes are done, you can merge these two halves back together, add some final touches, throw some textures and lights in the scene, and render it out. With that completed, you are then one step closer to being a professional modeler and creating your own low-budget Nickelodeon 3D Cartoon!
Points to remember when working on your first Hard Surface Model:
● Start simple and add detail later.
● Try to keep your polycount low, cylinders may take a little extra.
● Pay attention to your topology. You want straight lines and clean edges.
● You don’t need difficult tools and advanced plugins; you can create any object by adding and fortifying edges, extruding faces in or out, and beveling corners to get your desired look.
● Work smarter not harder. When you see an opportunity to only work on half, or a quarter of the shape because of its symmetry, use that to your advantage.
The final render shown above was created entirely in Maya using the above tools. The textures and lights were built with Arnold, a rendering software included with the download of Maya. It is 3 textures: shiny plastic, silver chrome, and a matte rubber.
—
Note From Tongal: "Tutorial: 3D Hard Surface Modeling for Beginners" is part of a series of Tongal Community-written blog posts that were originally sourced in the Tongal Blog Open Call Project. The views and opinions expressed in this article are those of the author(s) and do not necessarily reflect the official policy or position of Tongal. Read more Tongal Community-written posts here and then Pitch us a topic you'd like to write about for the Tongal Blog!