Years ago, I got my start in commercials as an editor, working for news stations like WQED Pittsburgh (the home of Mr. Rogers Neighborhood) and even editing political ads for many years. And while I don’t edit much anymore, I will still occasionally freelance myself out for edits during those slow winter months. But one component of being a good freelance editor is understanding that while you may be starting the project, oftentimes another editor is finishing it. Because of this, I wanted to go over some important editing checklists to keep your edits looking good, for when another editor steps in.
Get Folder Heavy
When you first start frantically loading in footage and creating a folder structure, be very mindful of naming conventions and the layout. Think of this step this way - if you sat down to make a quick fix on this edit, would you be able to easily navigate the folder structure? I was always taught to use two top-level folders; SEQUENCES and SOURCE.
I always keep that SEQUENCES folder top level because it will always be used. And we’ve all done the crazy search for a random sequence nested down six layers for some reason. Within here keep the folder organization going. Imagine I’m cutting three spots in a project - then each gets its own folder sequence.
From here, I immediately have my presets already built to create folders with top-level headers in that SOURCE folder. Things like GFX, AUDIO, and FOOTAGE. And again keep that folder structure going - within AUDIO you could have MUSIC, SFX, VO, NAT SOUNDS. Subfolders are your friend because it creates a generalized workflow that anyone can read, and cuts down on time searching.
The Best Names
How you name folders and files will again expedite things when someone else sits down after you on an edit. But there is nothing more important than how you name your sequences. Within that initial sequence bin, I keep it simple with two bins labeled CURRENT and OLD. A lot of editors will name their sequences using dates, and I tend to hate that. Tongal_Project111519 looks like a jumbled mess when I’m quickly searching. Instead, keep your current work sequence in a bit all to itself. I was always taught to use the Vs...V1, V2, V3. This is in the commercial world of course, as I’m sure films handle this differently. But this ensures idiot-proof numbering. V12 is, of course, more recent than V6.
No joke, but there have been times when I’ve had to step on to an edit and make a change within minutes. Now think of how easy that was when I knew the most recent sequence was in a bin called current - and it was the only one in there!
Tracking Your Tracks
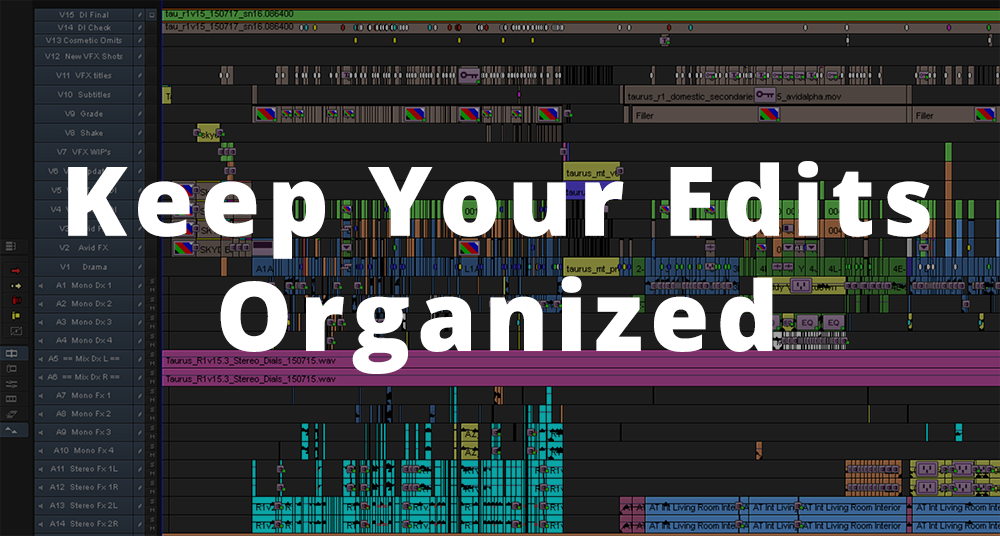
A messy timeline can derail a quick edit change in seconds. For some reason we editors have a habit of slapping random video clips on top of one another, creating stacks of video and audio layers that have no rhyme or reason. Instead, keep consistent video on its own track. I would much rather open a timeline with tons of video and audio tracks instead of finding a few tracks with random media scattered about.
Check out Mission Impossible’s recent timeline in Avid. While there’s a lot going on - it’s crazy organized!
Take my recent Tongal project for Bank of America, which had two interviews intercut, and b-roll. I never kept both interviews on the same video track as some might. Instead, I’d rather know that my V1 track was my first interview subject, my V2 track was my second, and so on.
Some editors think nesting sequences is the way to keep things organized, but for commercials, I disagree. For those unfamiliar, nesting (or subcomps) is when you take a gang of video clips and group them, forming them into their own sequence. On the timeline, it appears much cleaner. Trouble is, when I’m quickly searching for a specific shot in an unfamiliar edit, having to click through multiple nests can be time-consuming and confusing. With a movie or show, this makes sense as moving multiple clips can result in one getting left behind; something nesting would solve. But in the commercial world, this creates confusion as there are only so many clips on a timeline.
Missing Media
Think of the scenario that just happened to me on a recent editing project. There was a last-minute rush to replace a few stills, which were frantically being emailed to me one at a time. In that instance, it’s incredibly easy to just grab them from your downloads folder and throw them into the edit. But when it comes time to deliver that hard drive back to the client, they’d have missing media if they attempted to load the project months or years later. While this seems like common sense, I’ve seen this happen at major agencies and post houses.
And when it comes to Tongal projects, most times you’re delivering those final assets on a hard drive. Think of that sad producer who has to chase down a filmmaker because ‘missing media’ is popping up on their timeline - all because you grabbed a file from your downloads folder.
The media offline screen of death gives me nightmares just looking at it.
Save, Save, Super Save
That’s what my former boss would always say when he saw a thunderstorm approaching from the office windows, and we were concerned about the power going out. This should be common sense but for some reason, this still manages to screw things up. I’m currently typing this on a Mac. So in my edit, I hit ‘command s’ and my project is saved. It’s that simple. For me, it’s become second nature. Just tap those two keys very frequently and you’ll never have to worry.
There’s a big difference between editing your college projects and cutting with others in mind. If you follow simple organization strategies, anyone can (and should) be able to sit down at your edit and take the reigns without question. And now that you’re staying organized, you’ll start to notice just how disorganized plenty of others are. If you need another good resource, you can always check out Tongal’s Post-Production Guidelines as well. Good luck with the cuts!
---
Andy Kelemen is a commercial director and Tongaler who has worked for Disney, American Express, California Almonds, and Jack Link’s. Based in Pittsburgh PA, he still loves tackling a good edit.
Note From Tongal: “Post-Production Organization: Keep Your Edits Editor-Friendly" is part of a series of Tongal Community-written blog posts that were originally sourced in the Tongal Blog Open Call Project. The views and opinions expressed in this article are those of the author(s) and do not necessarily reflect the official policy or position of Tongal. Read more Tongal Community-written posts here and then Pitch us a topic you'd like to write about for the Tongal Blog!