
Be Your Own Storyboard Artist with Storyboard That!
Whether you’re in Pre-Production on your latest Tongal Video Project or working on your own side gig, storyboards go a long way saving time and money prior to production.
Who are we kidding, time IS money in production, so spending that “free” time up front during pre-pro is imperative to having a successful and hopefully more stress-free shoot. That’s why we’ve partnered with Storyboard That, so you can make important creative decisions without tallying an expensive pre-production bill.
New to Tongal? Learn How Tongal Works
and check out our Open Projects to get involved!
Now I don’t know about you, but my drawing skills plateaued at about “Coloring Book” level. Which is ok, because Storyboard That provides completed artwork so all you have to do is drag and drop your characters and scenes into the blank cells.
To make the storyboarding process even simpler here are three cool tricks they’ve shared with us to make your storyboards look professional. After you read through these tips be sure to access the exclusive deal we set up with them on our Community Resources page a 1-month free trial and 25% off a yearly subscription!

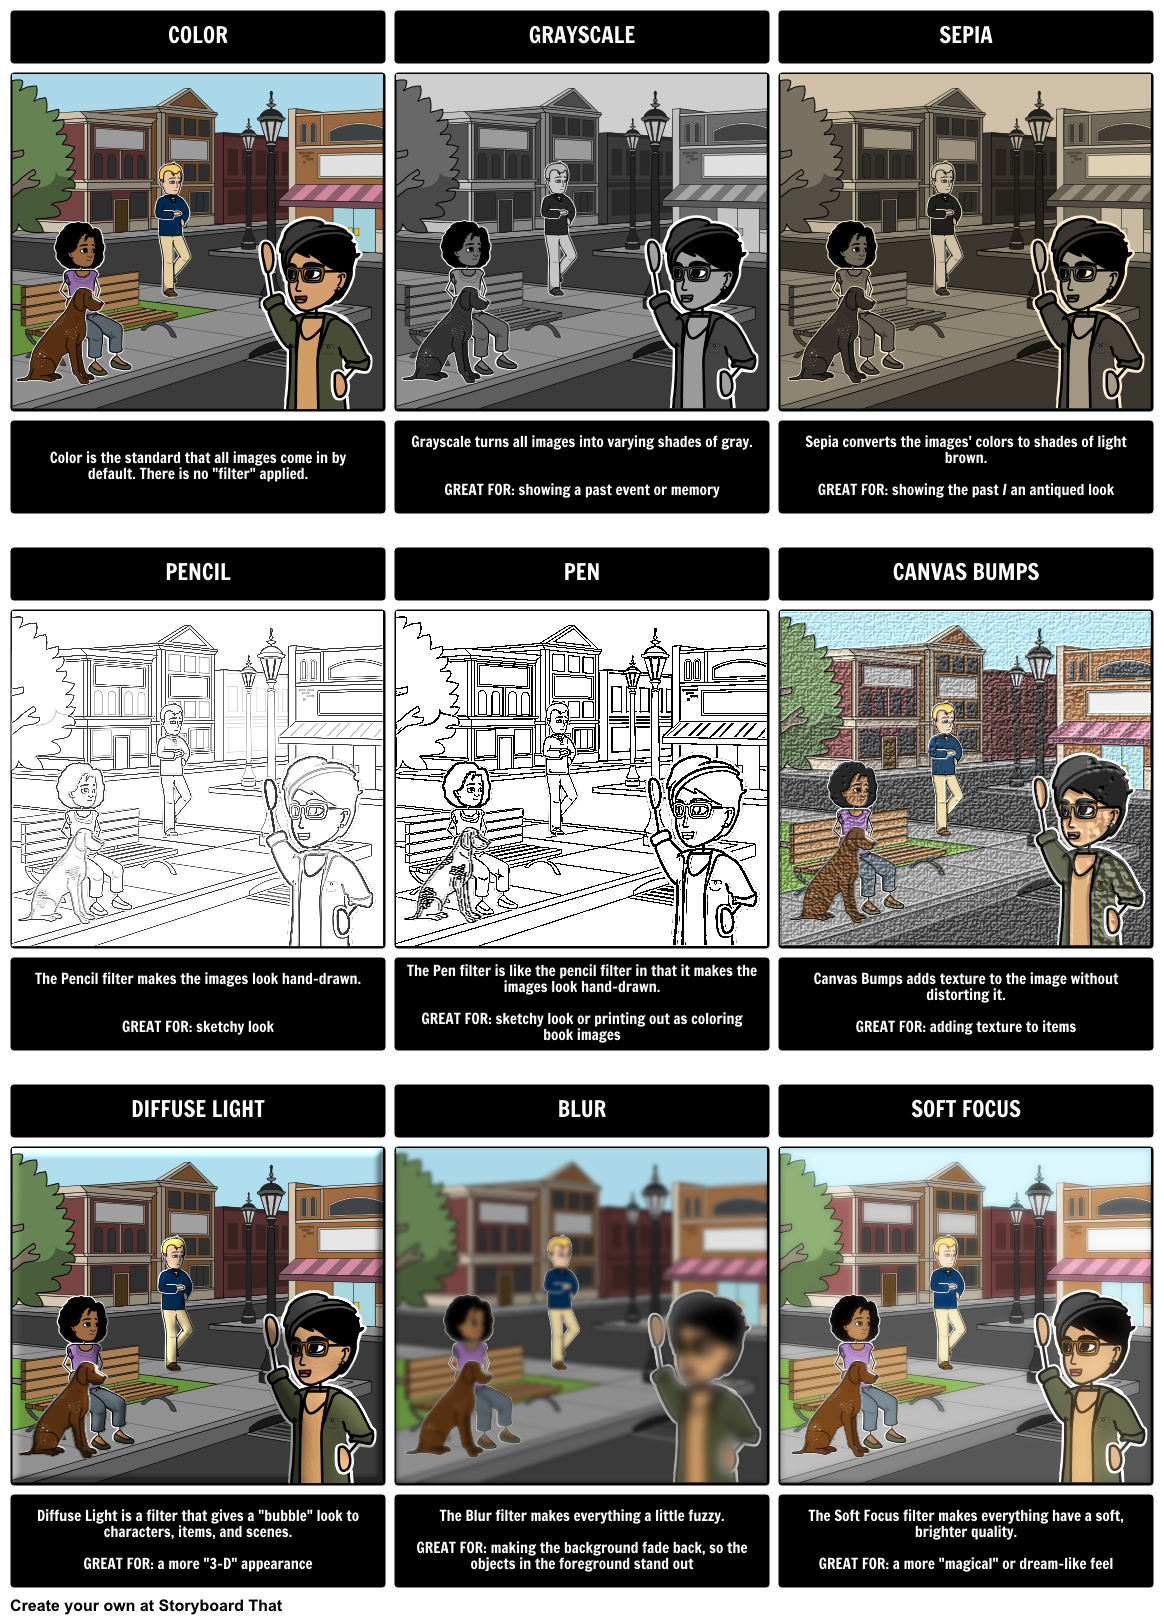
Another cool trick to make your storyboards more professional is to explore the filters and effects. Adding a filter or an effect to a scene is a simple one-click edit that changes the feel of your storyboard entirely.
All scenes can be filtered by clicking the “Filters” option when the scene is highlighted. Feel free to test out a few effects and see which one fits best. Here are some examples of how adding filters and effects can convey certain moods:
3. Changing Character Positioning
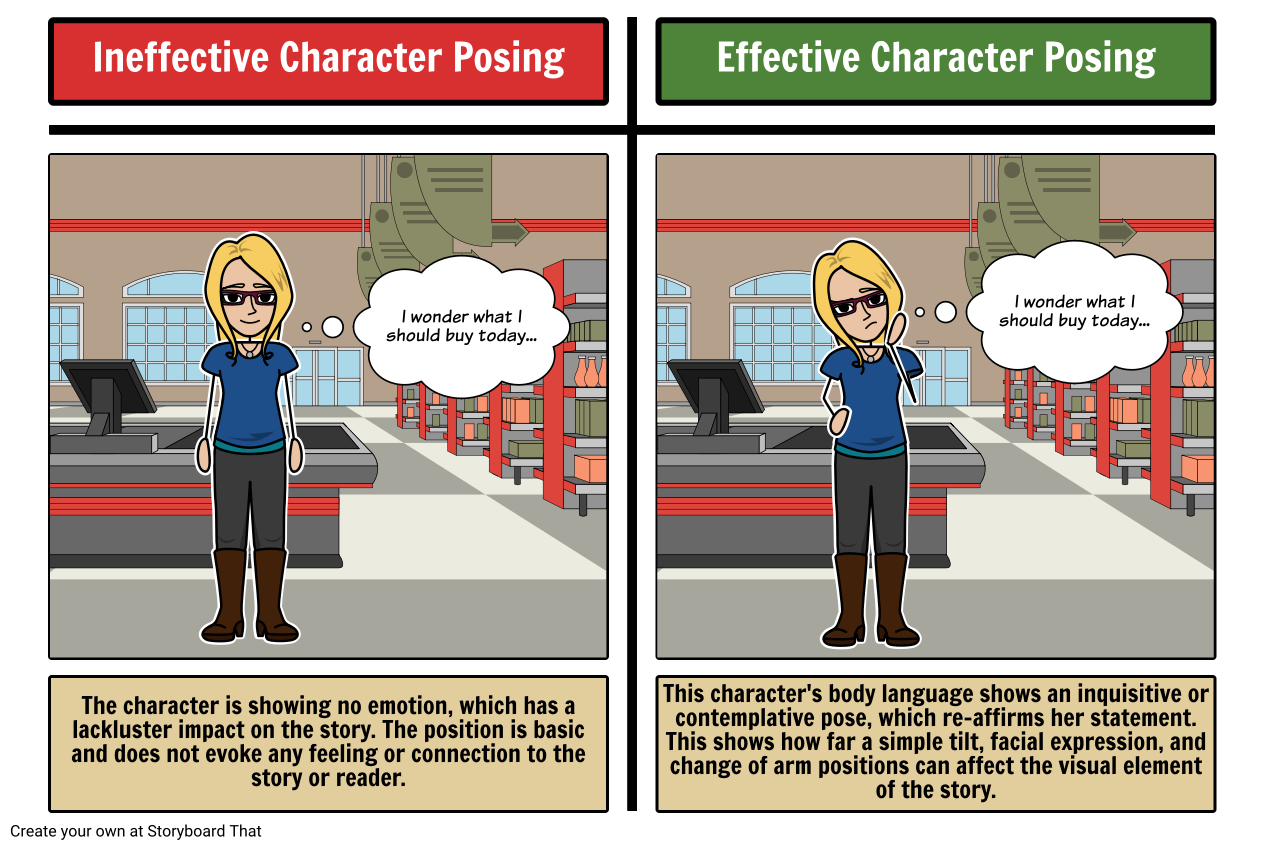
Lastly, a cool and easy trick to make your storyboards seem more professional is to edit your characters positioning so their emotion is clear to the viewer. Storyboard That makes is very easy to edit any of your characters' poses:
Simply choose a character, drag them down to the cell, and click “Edit Pose”.
This allows you to edit which way the character is facing, their leg and arm positioning, and their facial expression. Here is an example of ineffective character posing vs. effective character posing. You can also give it a try yourself and create your own storyboard!
Now that you’ve got a head start on becoming your own storyboard artist head to our Community Resources page, access the Tongal exclusive deal (which includes a 1 month free trial and 25% off a yearly subscription) and start creating your own storyboards!